“Webinars convert up to 73% better than other lead-gen tools.”
That’s not a myth—it’s a marketer’s secret weapon. Yet, when I hosted my first webinar,
I was paralyzed by all the tech options. Zoom, GoToWebinar, expensive automation tools… I nearly gave up.
Then I found Systeme.io.
A single platform. No plugins. No tech headaches. Just pure simplicity.
And that’s when everything changed.
If you’ve ever thought, “I want to run a webinar but don’t know where to start” — this guide is for you.
I’ll walk you through how to make a webinar on Systeme.io — whether you’re planning a live event
or building an evergreen funnel that sells while you sleep.
1. What Is Systeme.io and Why Use It for Webinars?
Before Systeme.io, creating a marketing funnel meant duct-taping tools like ClickFunnels,
Mailchimp, WordPress, and Zoom — each with its own price tag and learning curve.
Systeme.io flips the script.
It’s an all-in-one marketing platform that helps you:
- Build funnels
- Send email campaigns
- Host courses
- Automate entire businesses
- … and yes, run webinars, both live and evergreen.
Unlike traditional webinar platforms, Systeme.io integrates everything under one roof — landing pages,
email automation, payment gateways, and webinar hosting (via YouTube Live or recorded videos).
If you’re on a budget, short on time, or tired of tech headaches — Systeme.io is your best friend.
2.Types of Webinars You Can Run on Systeme.io
You’ve got options! Systeme.io supports different webinar styles, depending on your strategy
and tech comfort.
✅ Live Webinars (via YouTube Live)
Perfect for real-time engagement, Q&A sessions, and product launches.
🔁 Automated / Evergreen Webinars
Ideal for creating a “set it and forget it” funnel that runs on autopilot. Just upload your pre-recorded
video and schedule it to run on specific days/times.
🔄 Hybrid Webinars
Use a pre-recorded presentation, but still join live to answer questions via chat.
Whether you’re teaching, selling, or coaching — there’s a format that fits your brand.
3. Step-by-Step: How to Make a Webinar on Systeme.io
Let’s get our hands dirty! Here’s how you can create your evergreen webinar funnel from scratch on Systeme.io
Step 1: Sign Up for a Free Systeme.io Account
Visit Systeme.io and create your account. The free plan is surprisingly generous!
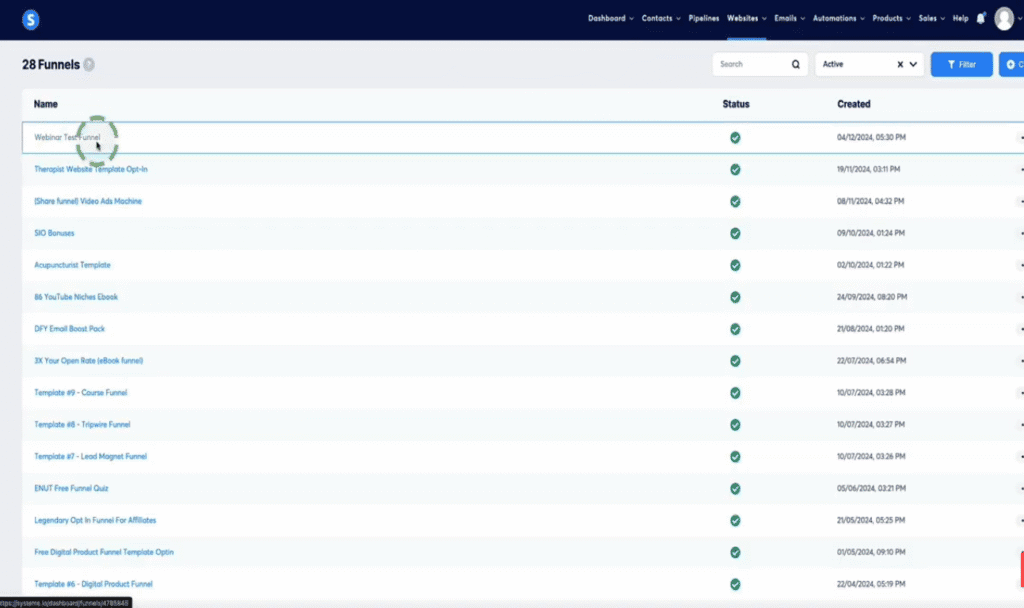
Step 2 : Create a New Funnel
1.2 Go to “Funnels” → “Create”
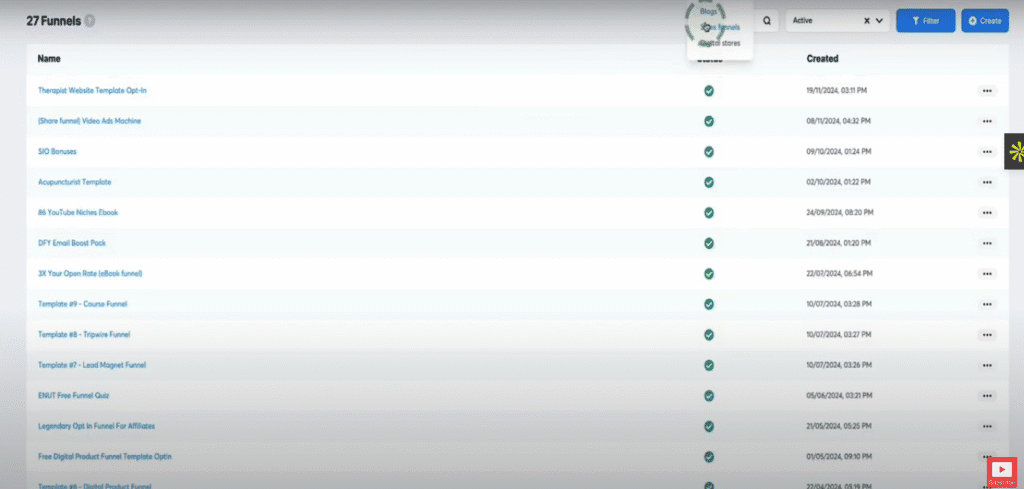
2.2 Choose “Webinar Funnel” or “Custom” funnel.
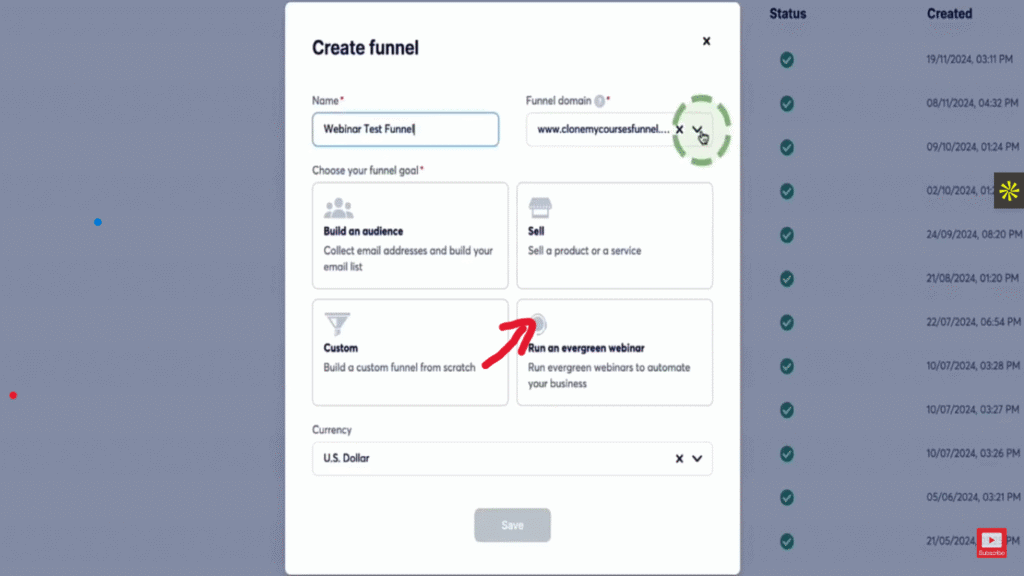
2.3 Click on the funnel you created
Step 3: Build Your Webinar Registration Page
1.3 Click on the ‘ Webinar Registration ‘ and select the template you like

2.3 Add the name , duration with seconds and URL path then edit
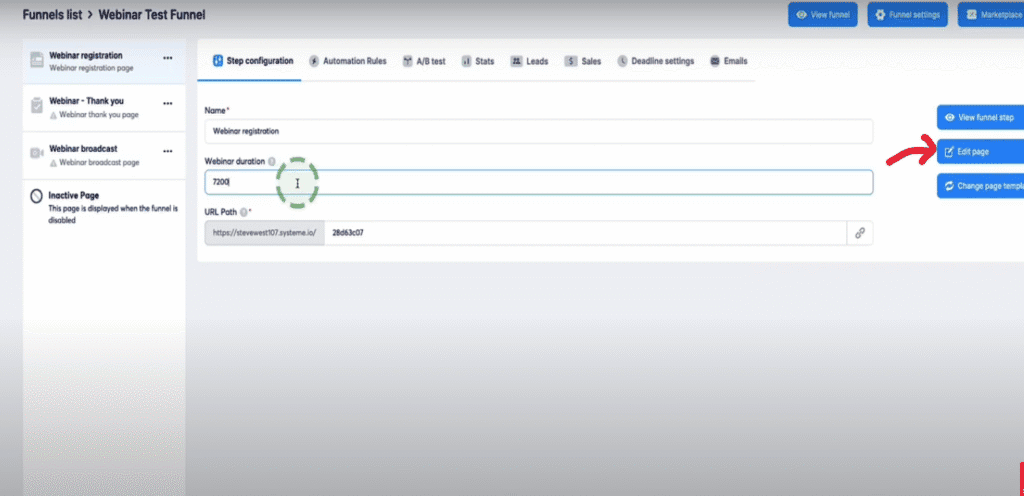
3.3 Edit the registration page to your liking
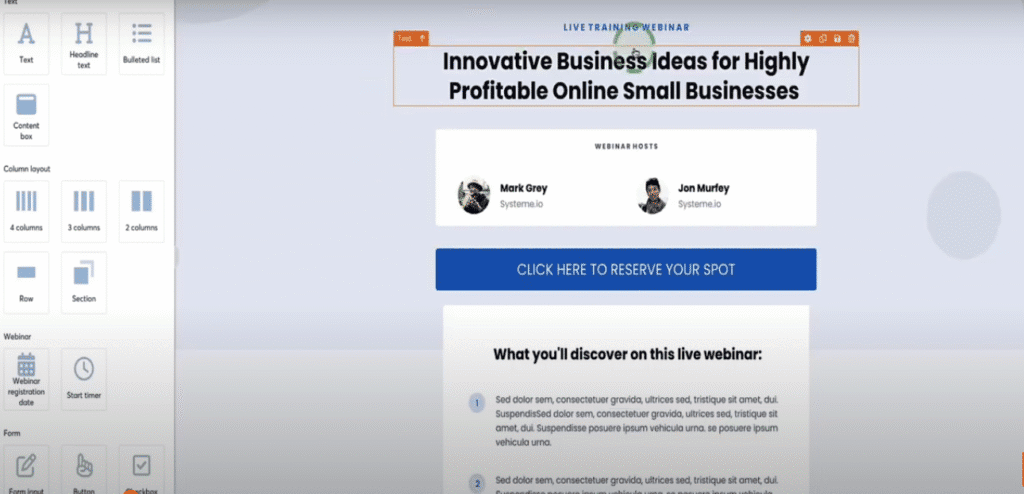
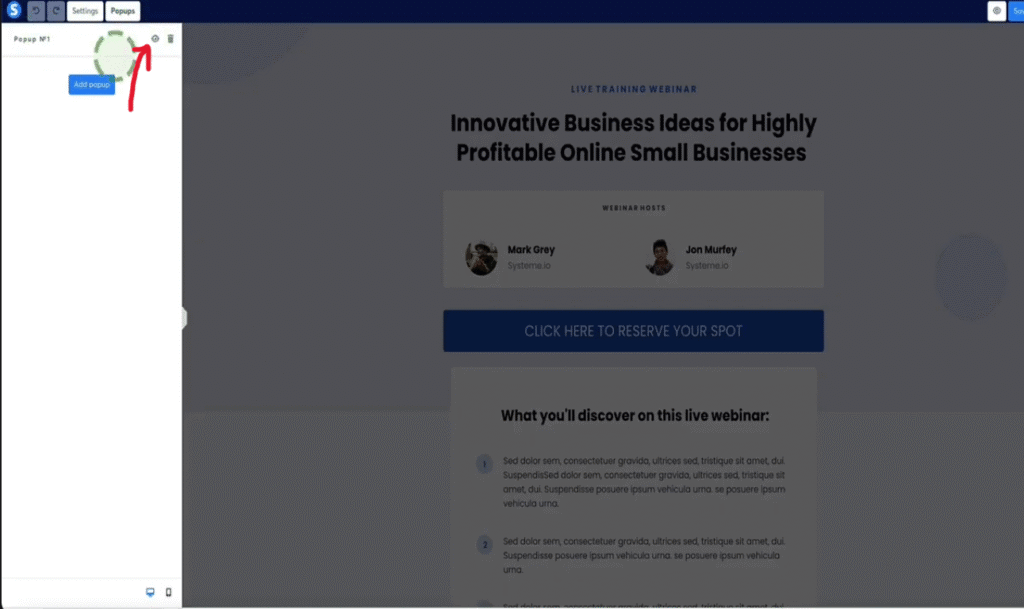
4.3 Click on pop-ups to create one
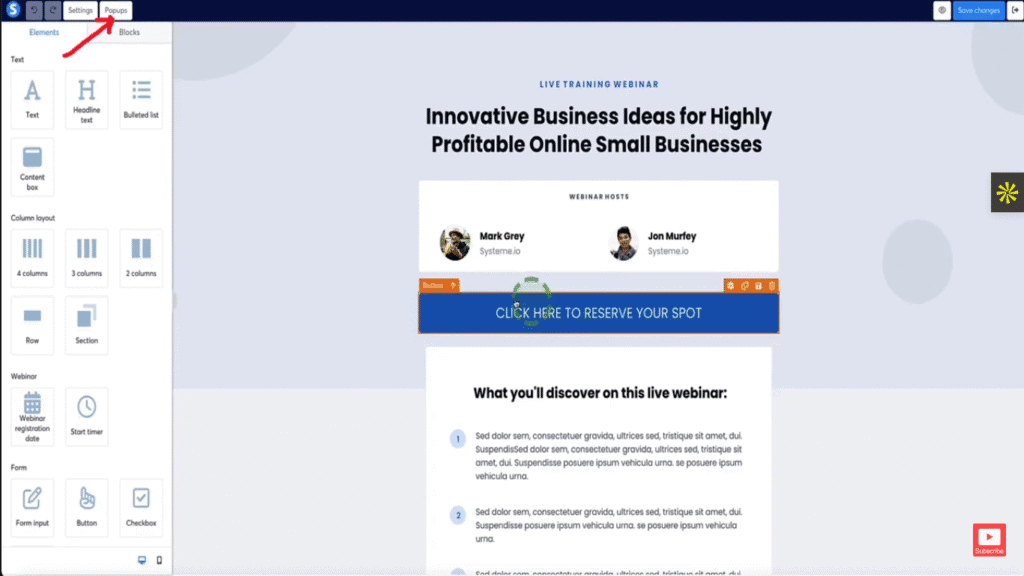
5.3 Click here
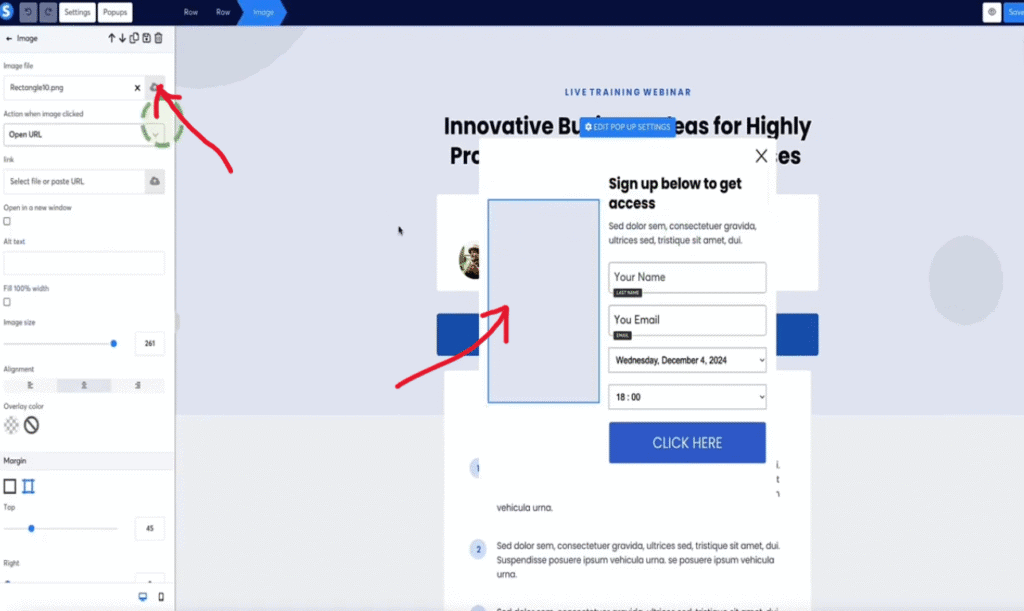
6.3 Click here to add an image
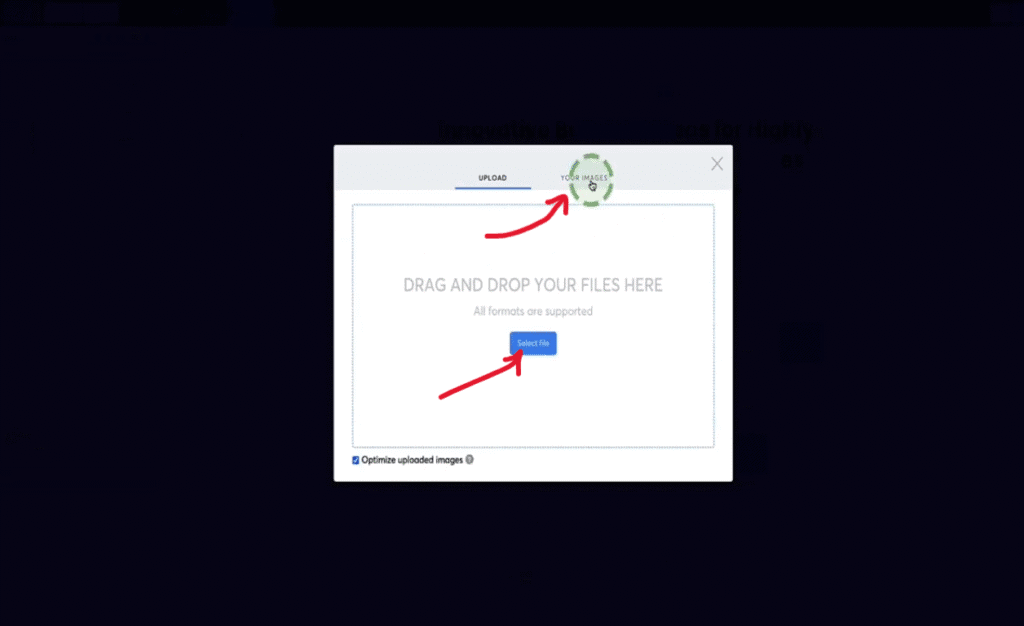
7.3 Select your image from here
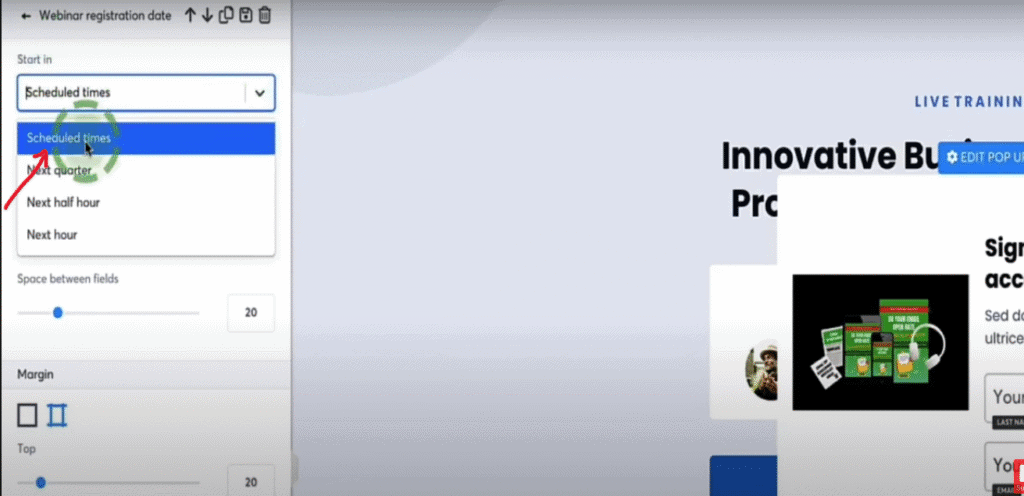
8.3 Choose the scheduled time for your webinar. If your choose ‘ Next quarter’ for example, the webinar will be
available after 15 minutes someone signs up. If they sign up at 4:45 , it will be available at 5:00
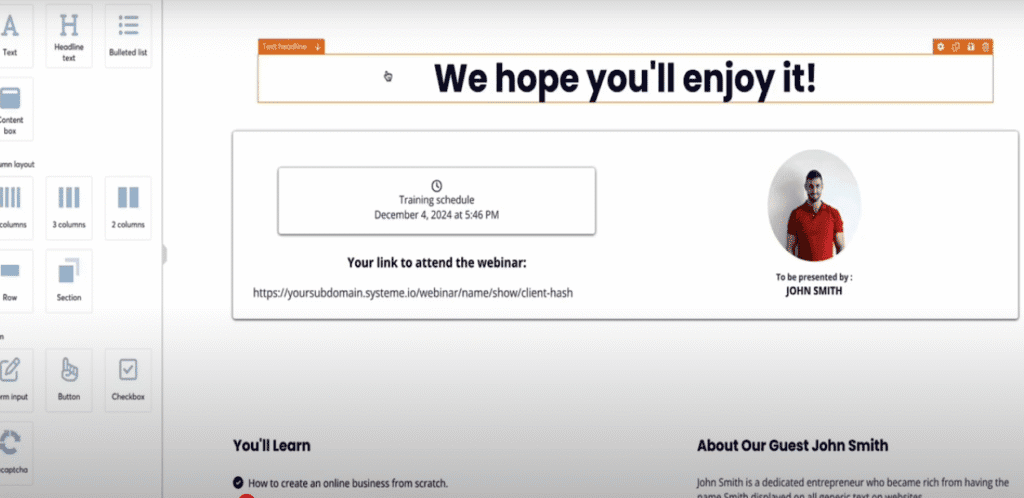
Step 4: Build Your Webinar Thank You Page
1.4 Click on ‘Webinar – Thank You ‘ and select a page of your preference
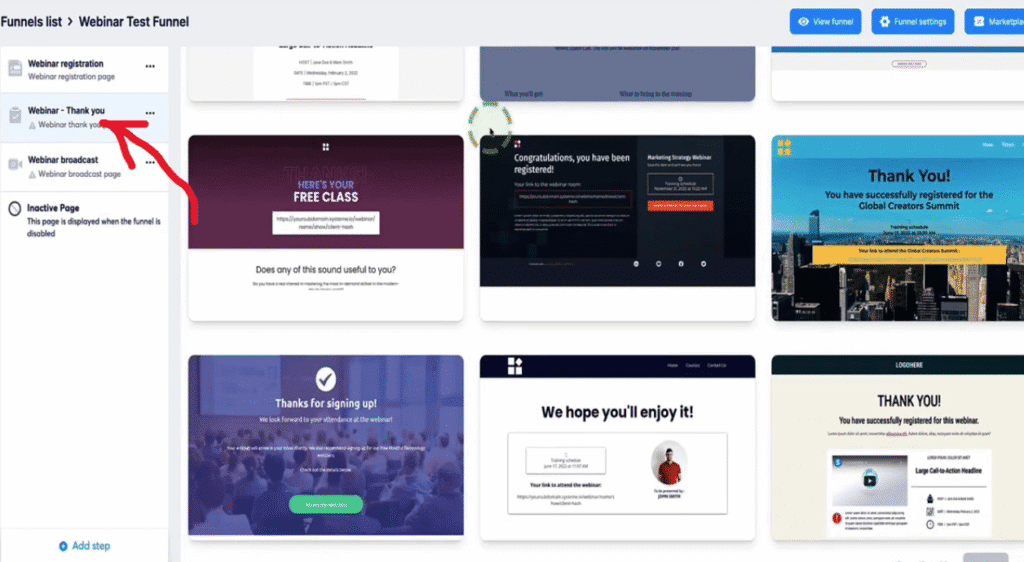
2.4 Edit the thank you page
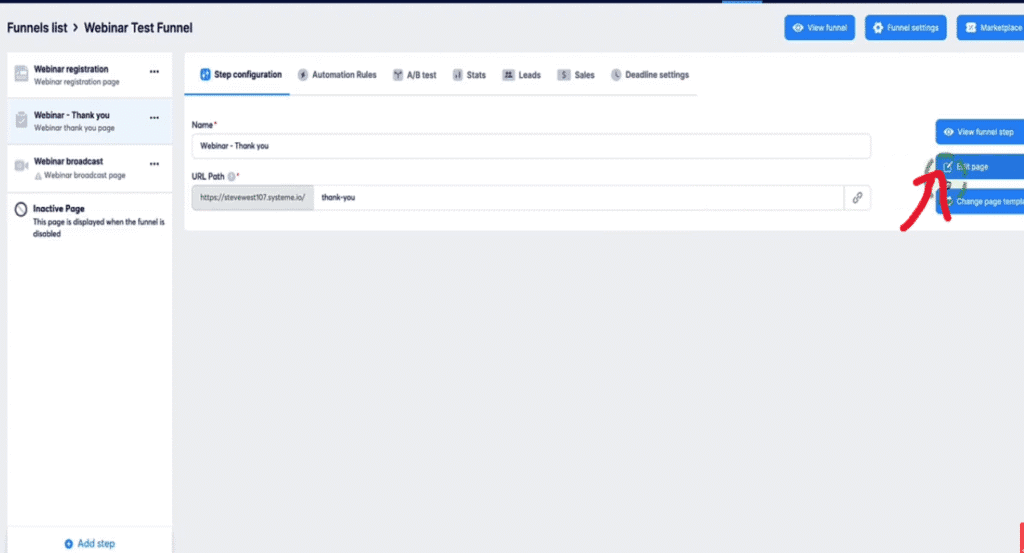
3.4 Edit the color, brand and font to your liking
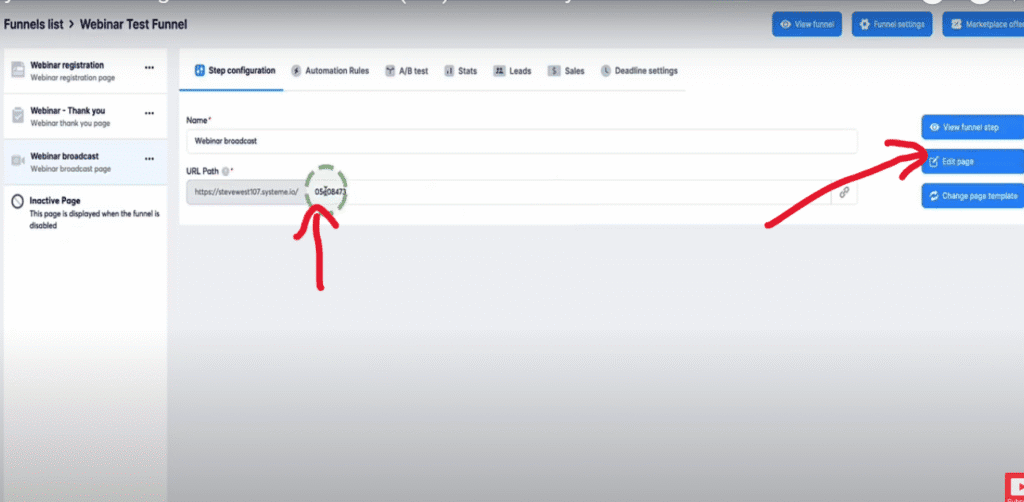
Step 5: Build Your Webinar Broadcast Page
1.5 Click on ‘ webinar broadcast ‘ and choose your template then edit it
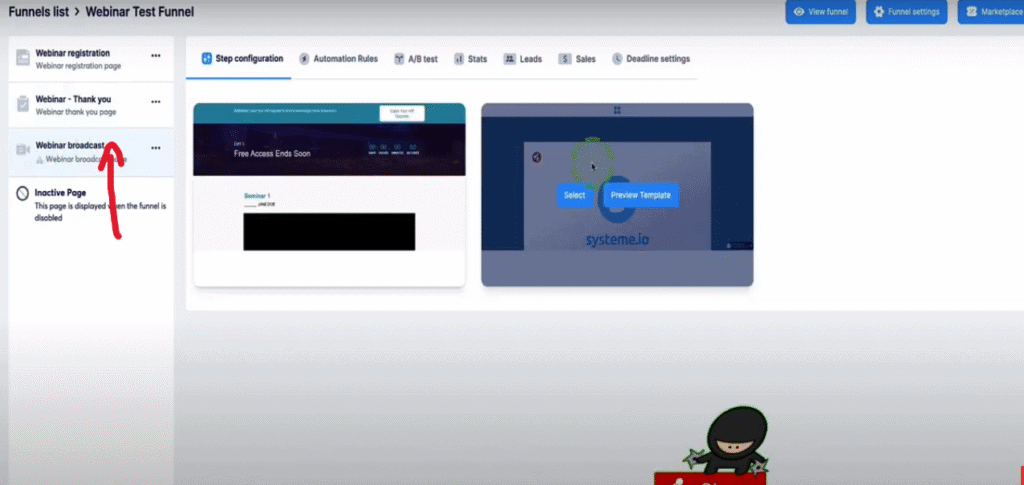
2.5 Change the URL path and Edit page
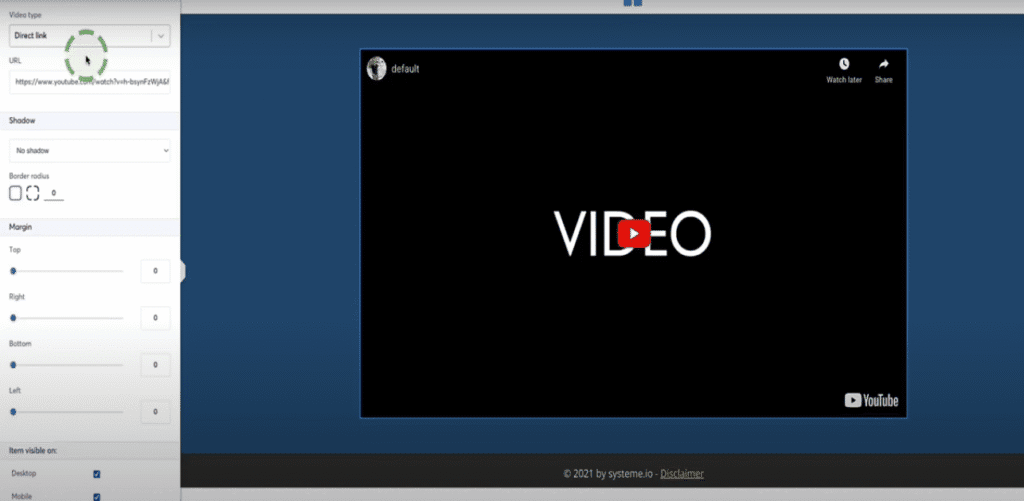
3.5 Choose webinar video type. You have two options
whether it’s a direct link ( of another site like Youtube or Vimeo ) of the video here
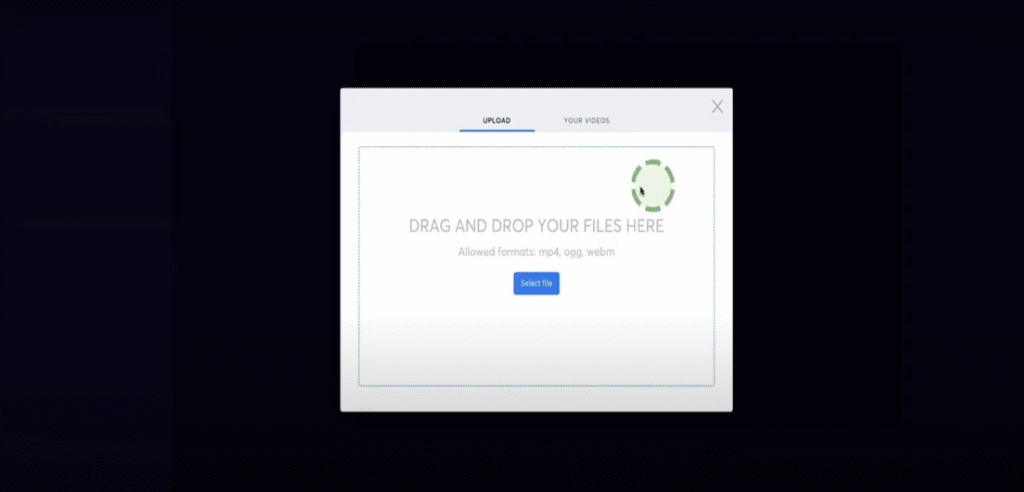
4.5 or upload video directly from your device
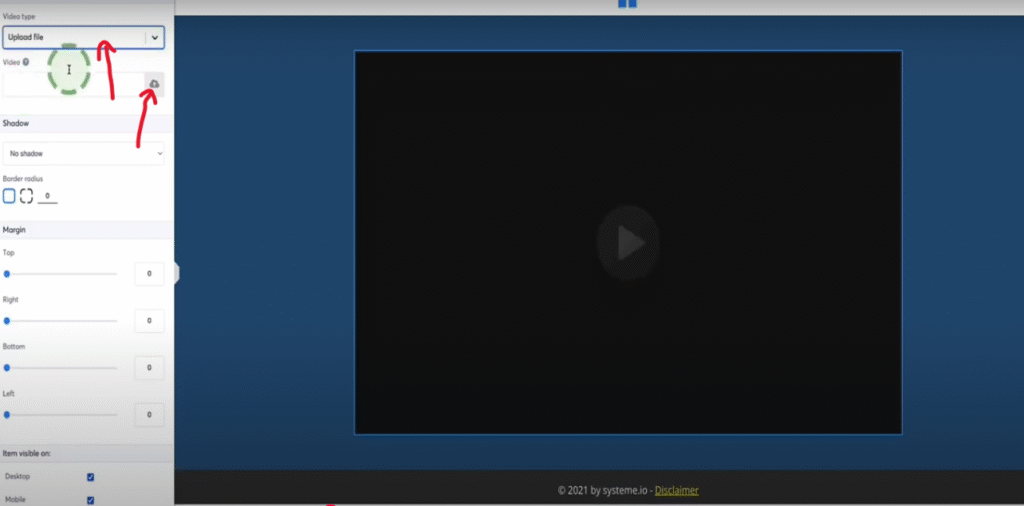
5.5 Select the video
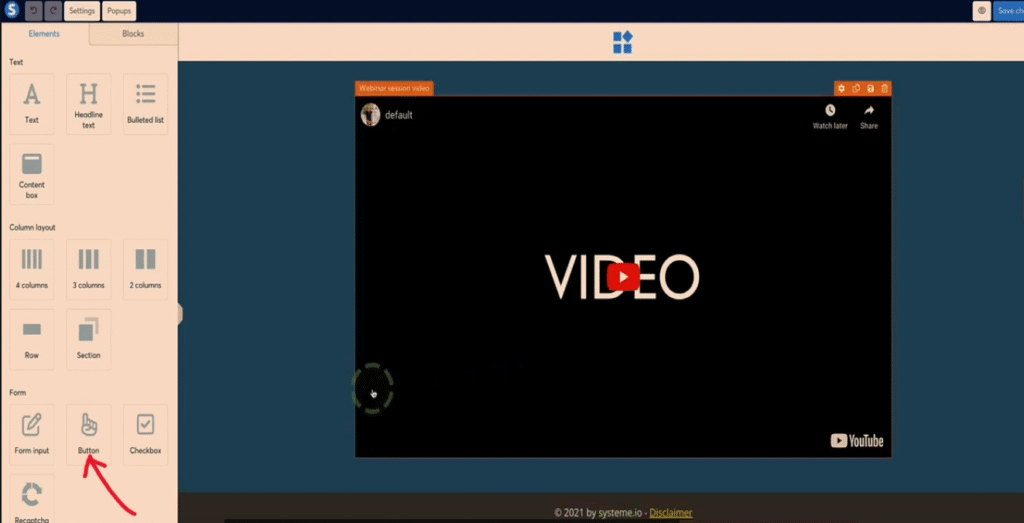
6.5 You want to add a purchase button to the page so your prospects can buy through it.
Click on Button and drag it in.
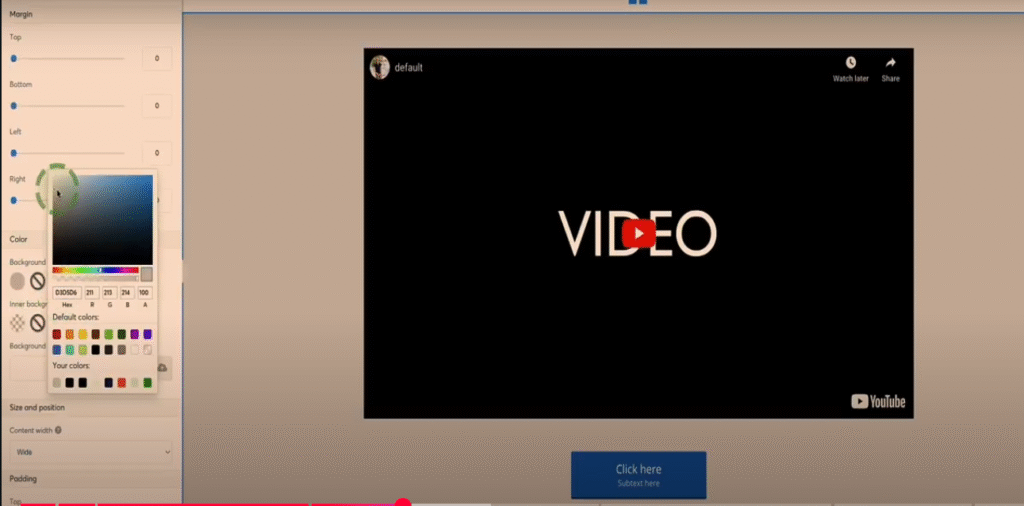
7.5 Change its color to the one you want
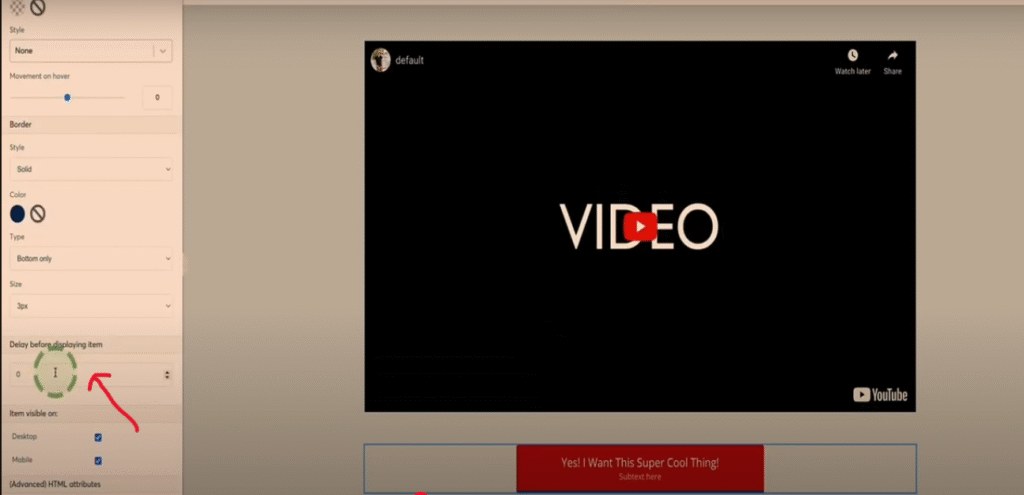
8.5 Now you want to set how many minutes to delay the button before displaying it.
9.5 Select elements you want to add to your page
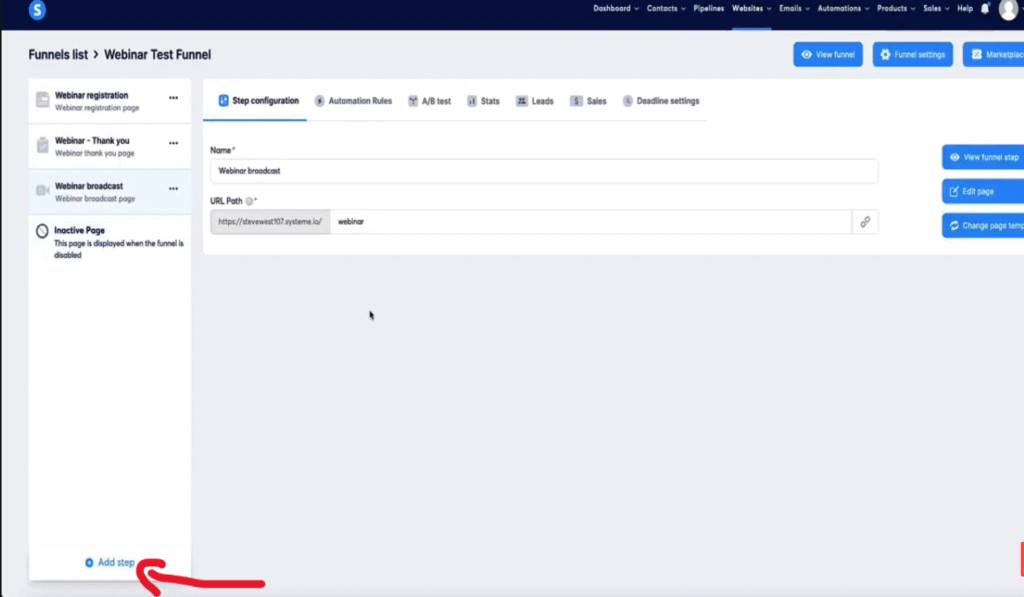
Step 6: Set Up check-out page
6.1 Add step
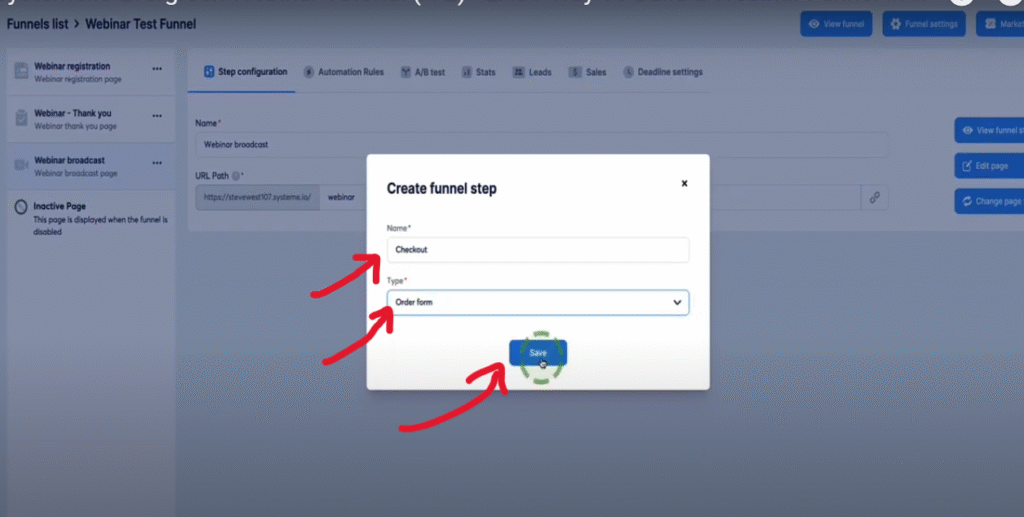
6.2 Name the page, choose the type ( order form ) and save
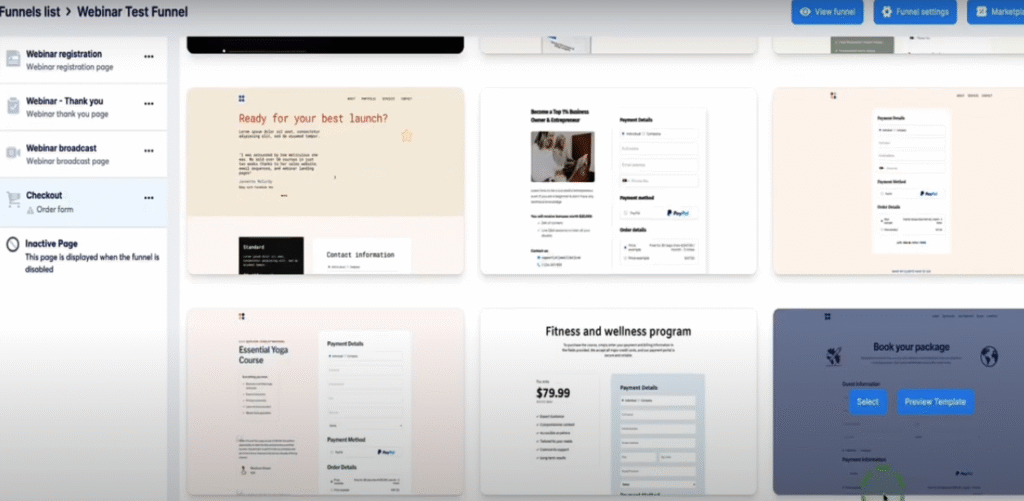
6.3 Select a template of your choice
6.4 Edit URL path and edit the page
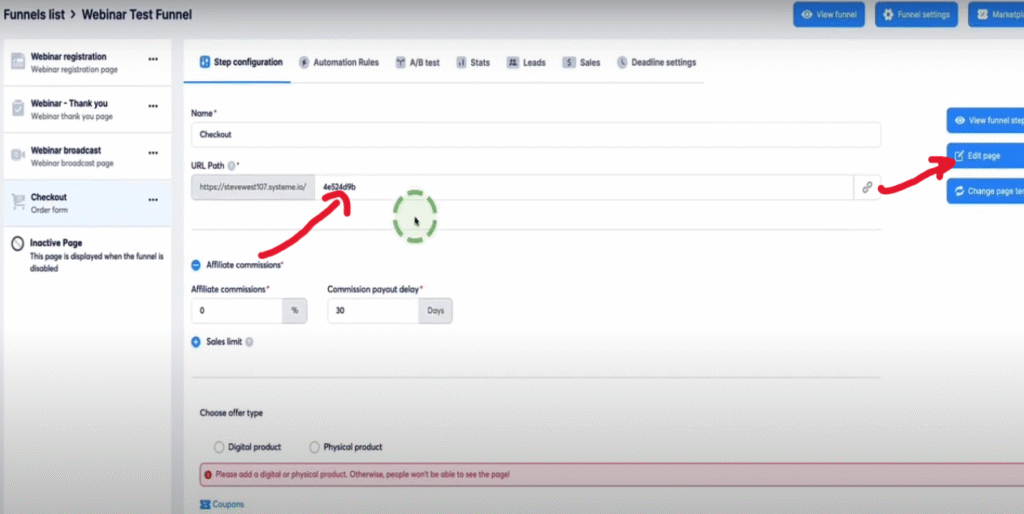
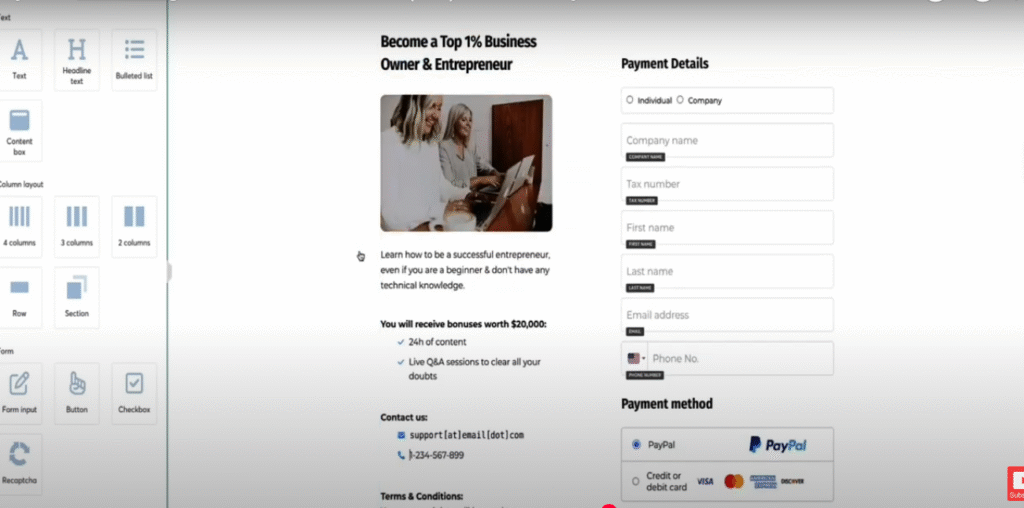
6.5 Now you want to set up the product delivery and choose whether it’s a digital product or a physical product.
Let’s say you are selling a digital product like a course.
select digital product.
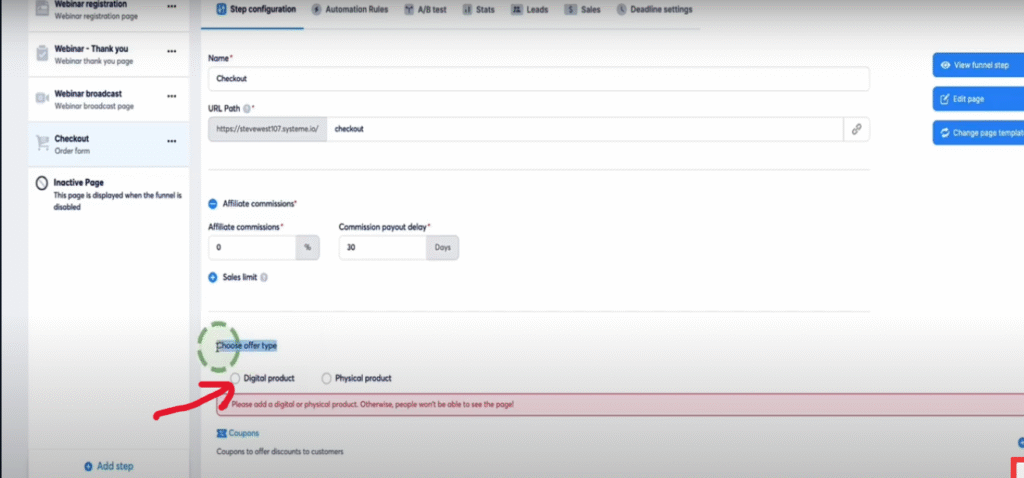
Since it is very important , I created a separated step by step tutorial here on how to set up your check out page for a course.
Step 7: Set Up Email Campaign
This is another detailed tutorial on how to create another email campaign
Step 8: Set Up Email Automation
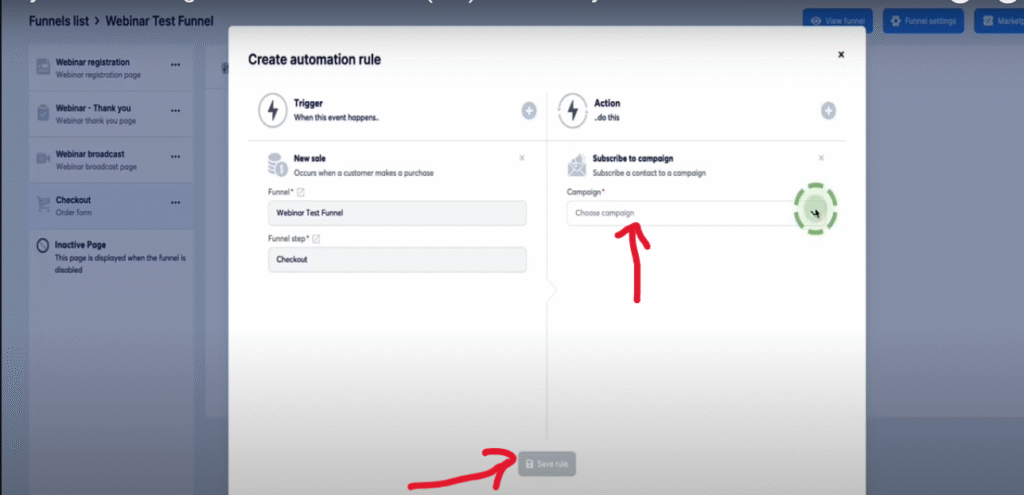
8.1 Click on Automation Rules and Add a rule
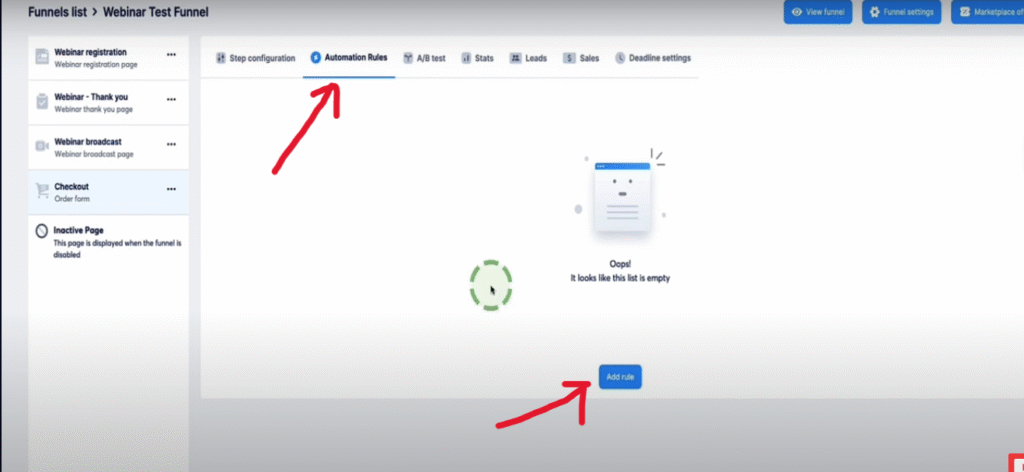
8.2 Choose a trigger then a new sale
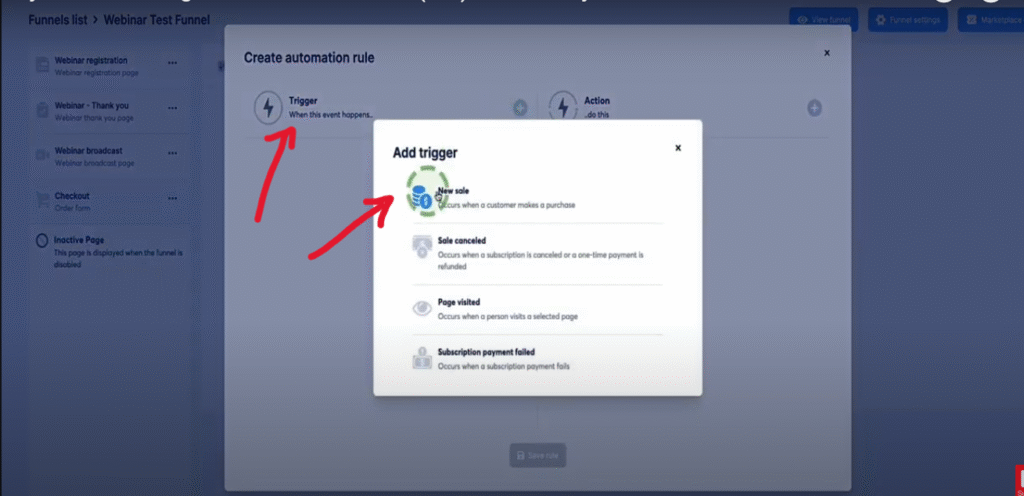
8.3 Choose the action you want to take( Subscribe to a campaign)

8.4 Choose the specific campaign you want and save
Create a sequence to:
Step 9: Connect the Check out page to the webinar button
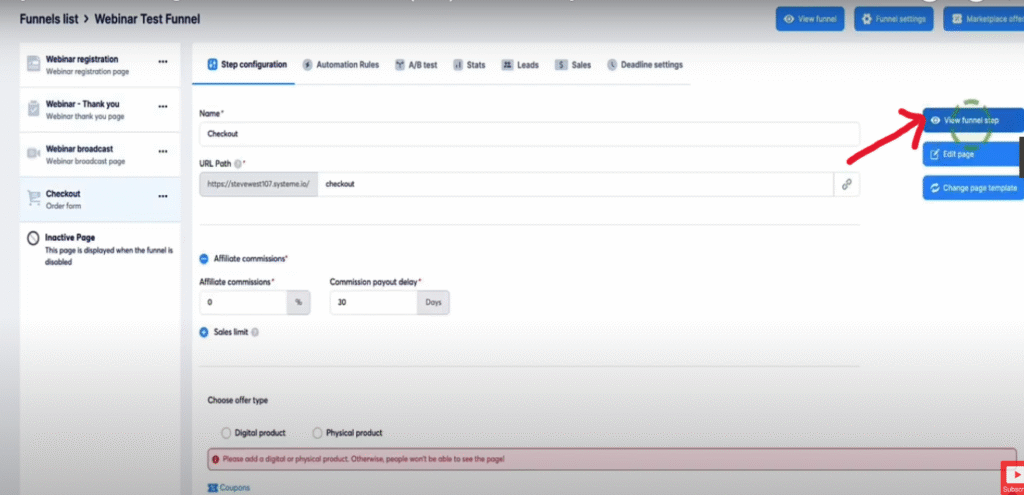
9.1 Click on ‘ check out” , view funnel step then copy the page url
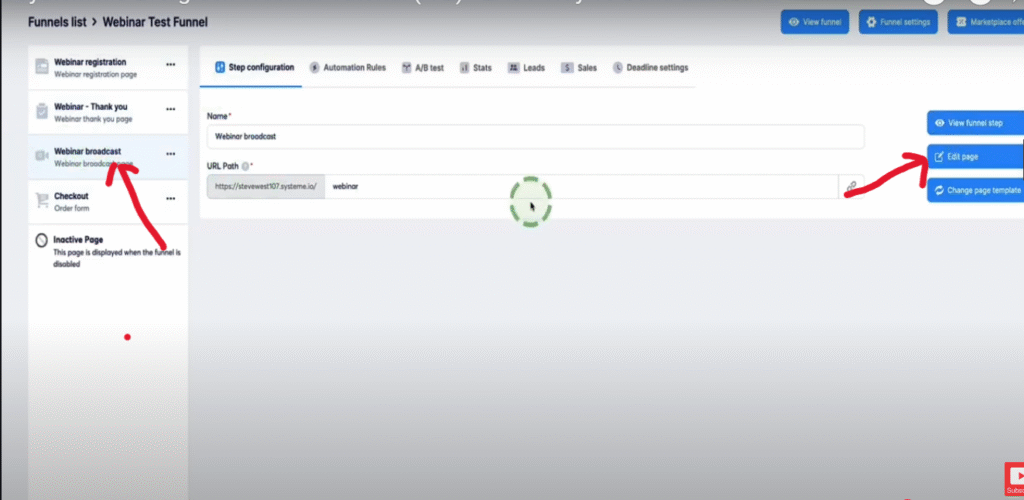
9.2 Go to the webinar broadcast and edit page
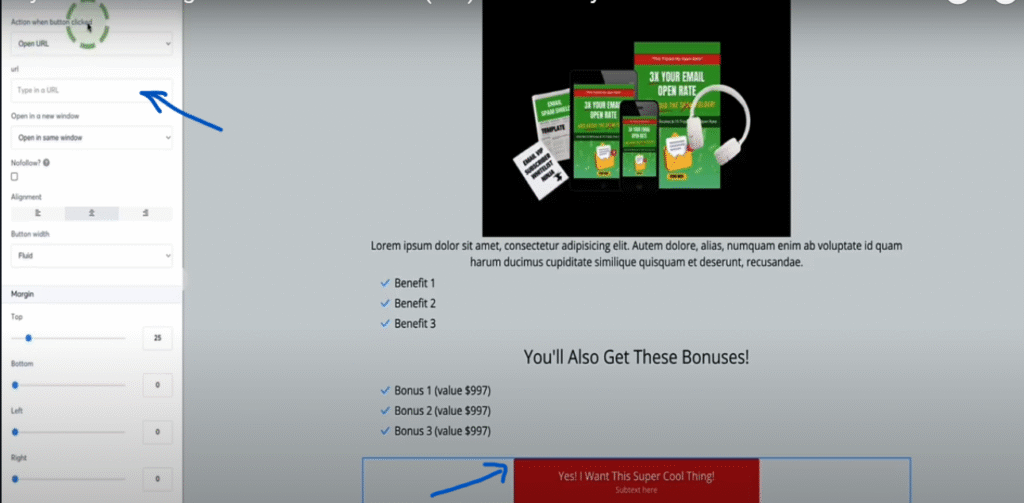
9.3 Click the button below the video and paste URL
Step 10. setting up delivery of your webinar replay link
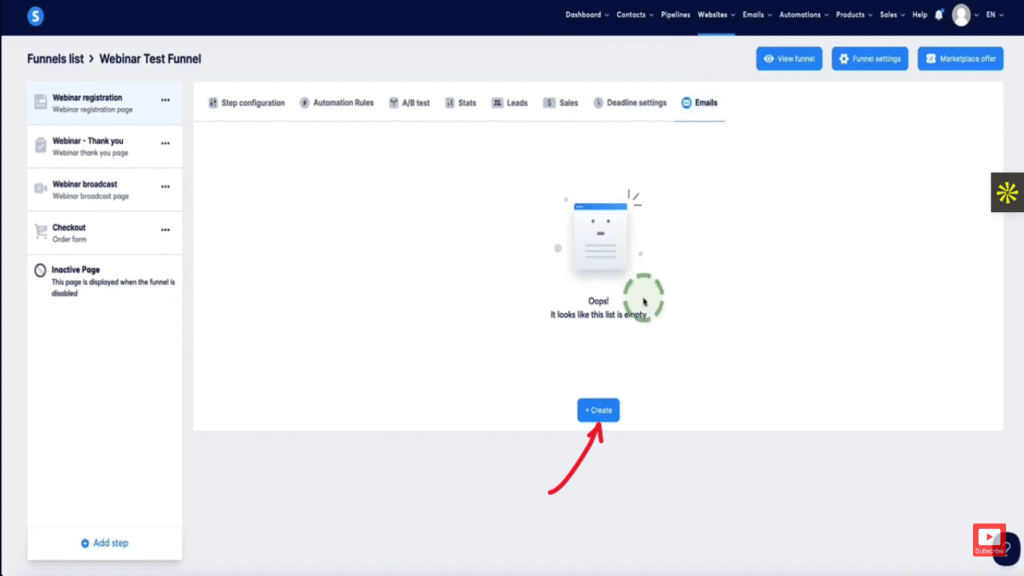
10.1 Click on webinar registration then emails
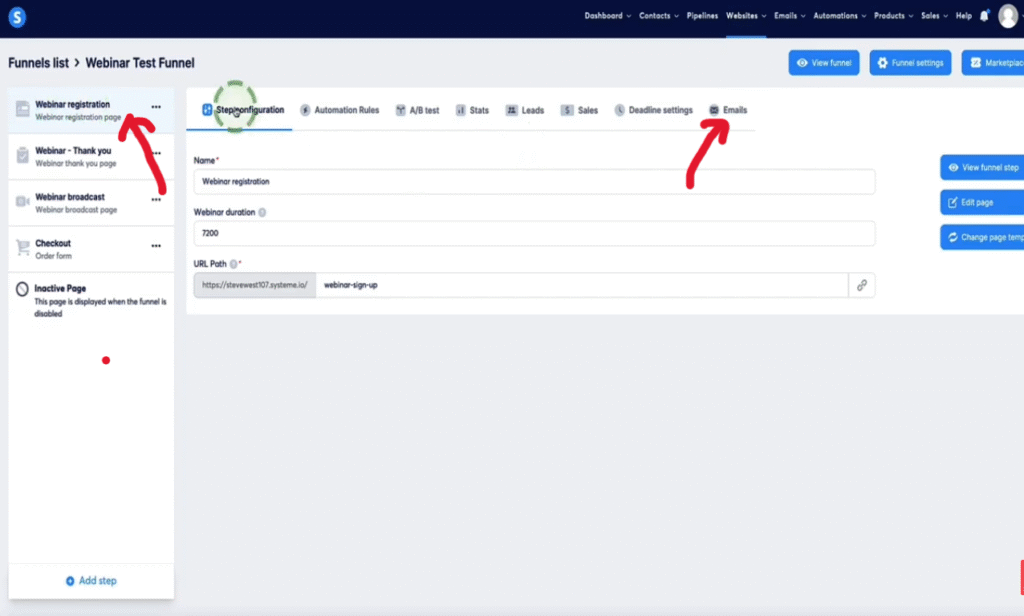
10.2 Create email
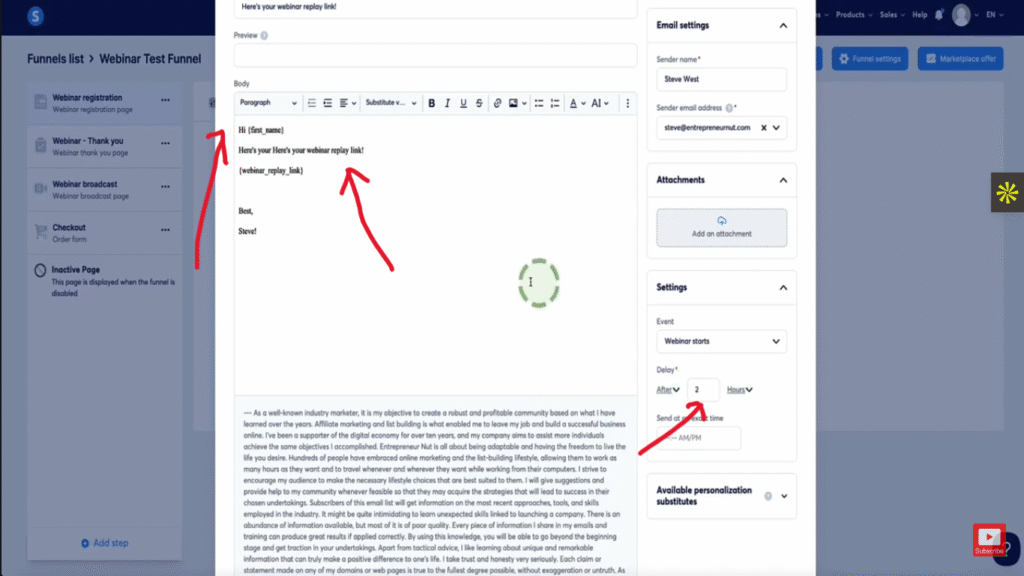
10.3 Set up your email and time it will be sent after the webinar
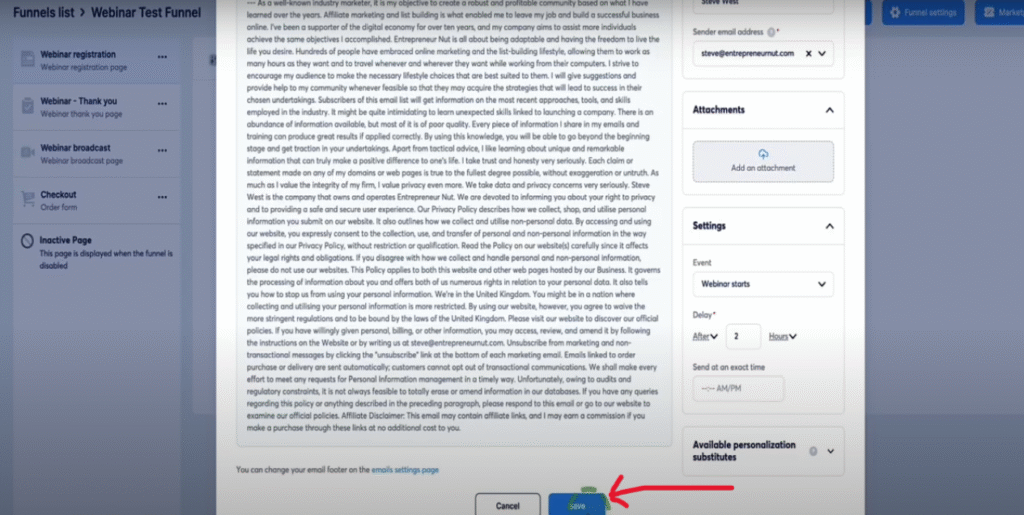
10.4 Finally save your work
11. How to make a webinar more interactive
10 Tips to Run More Interactive Webinars in 2025
Webinars are no longer just about presenting slides—they’re about creating real-time connections.
In 2025, audiences crave engagement, not lectures. Want to boost participation,
keep viewers hooked, and drive better results? Here are 10 smart, actionable
tips to run more interactive webinars this year:
- Start with a Warm Welcome – Break the ice with a friendly intro, short poll, or fun question in the chat.
- Use Live Polls & Q&A – Platforms like Zoom and Systeme.io let you easily run polls or host real-time Q&As.
- Encourage Chat Participation – Prompt attendees to comment or answer questions during your session.
- Add Interactive Slides – Use clickable slides or embedded quizzes to keep the energy high.
- Break the Monologue – Pause often, check in with viewers, and respond to comments live.
- Invite Guest Speakers – Surprise your audience with fresh voices and expert insights.
- Use Storytelling – Share relatable stories to spark emotions and keep people listening.
- Offer Instant Downloads – Give away checklists, guides, or bonuses during the webinar.
- Gamify Your Webinar – Run mini-contests or giveaways to reward active participants.
- End with Engagement – Ask for feedback, invite to a community, or spark a post-webinar challenge.
By making your webinars more interactive, you’ll not only boost attendance and retention—you’ll build
real trust and connection with your audience.
12. Frequently Asked Questions
- How to create and host a webinar?.
To create and host a webinar, choose a platform (like Zoom or Systeme.io), plan your content,
set a date and time, design a registration page, promote it via email and social media,
then go live and engage your audience.
- 2. How to Set Up an Automated Webinar ?
To set up an automated webinar:
- Choose a platform – Use tools like Systeme.io, EverWebinar, or Demio.
- Record your webinar – Prepare and record your presentation in advance.
- Upload the video – Add it to the webinar platform.
- Create a registration page – Collect attendee info automatically.
- Set schedule options – Choose evergreen (recurring) times or on-demand access.
- Automate emails – Set up reminder and follow-up emails.
- Launch and promote – Share your link via email, ads, or social media.
It runs on autopilot while you focus on other tasks.
- 3. How to make a webinar template?
To make a webinar template:
- Choose a format – Decide on the structure (e.g. intro, main content, Q&A, call-to-action).
- Outline key sections – Include:
- Title & subtitle
- Speaker intro
- Problem/promise
- Main teaching points (3–5)
- Case studies/testimonials
- Offer/CTA
- Q&A and closing
- Design slides – Use PowerPoint, Canva, or Google Slides with a clean, branded design.
- Add placeholders – Leave space for personalized content (e.g. name, topic, date).
- Save as a reusable file – Export it as a template or duplicate it for future webinars.
This saves time and ensures consistency for every webinar you host.
- 4. How to create your evergreen webinar funnel ?
To create your evergreen webinar funnel:
- Record your webinar – Create a high-quality, pre-recorded webinar with strong teaching and a clear offer.
- Choose a funnel builder – Use tools like Systeme.io, ClickFunnels, or EverWebinar.
- Create a landing page – Design a registration page with a compelling headline and sign-up form.
- Set up an automated schedule – Let viewers choose dates/times or offer on-demand access.
- Build an email sequence – Include confirmation, reminders, and follow-up emails (with replay and offer).
- Add a sales page – Direct attendees to a page that sells your product or service after the webinar.
- Integrate tracking tools – Use analytics and email tags to follow up based on viewer behavior.
- Test and launch – Run a few test leads through the funnel, then start promoting it continuously.
This turns your webinar into a 24/7 sales machine.