
In this article, I will show you a step by step tutorial about how to create a funnel for free on Systeme.io
Building a high-converting funnel used to require deep pockets and technical expertise.
Not anymore!
1. Basic steps of creating a funnel :
- Define your goals
- Develop valuable content offers
- Get a free sales funnel builder
- Setup a sales funnel website
- Create a landing page
- Create email sequences
- Integrate a payment gateway
To cut it short, Here is a Step by step tutorial on how to build a sales funnel from scratch on Systeme.io for free.
You may ask ‘How many funnels can you have on Systeme.io for free?’
You can make up to three funnels on Systeme.io for free
Again how to create a systeme.io funnel?
2. Steps of creating a funnel
Let’s say you want to build an audience
A . Create a landing page
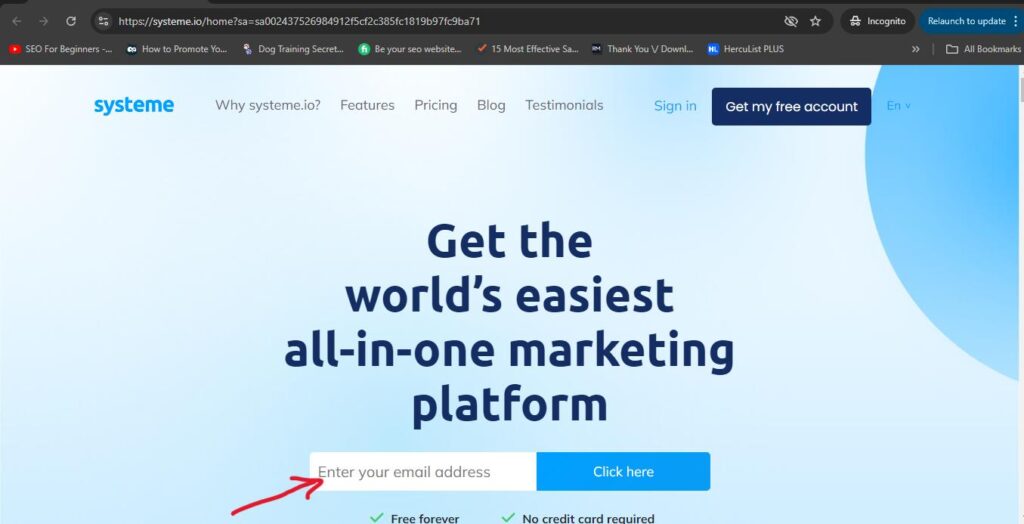
- Create a free account
Simply enter you email here ( as indicated on this page ) for a new account
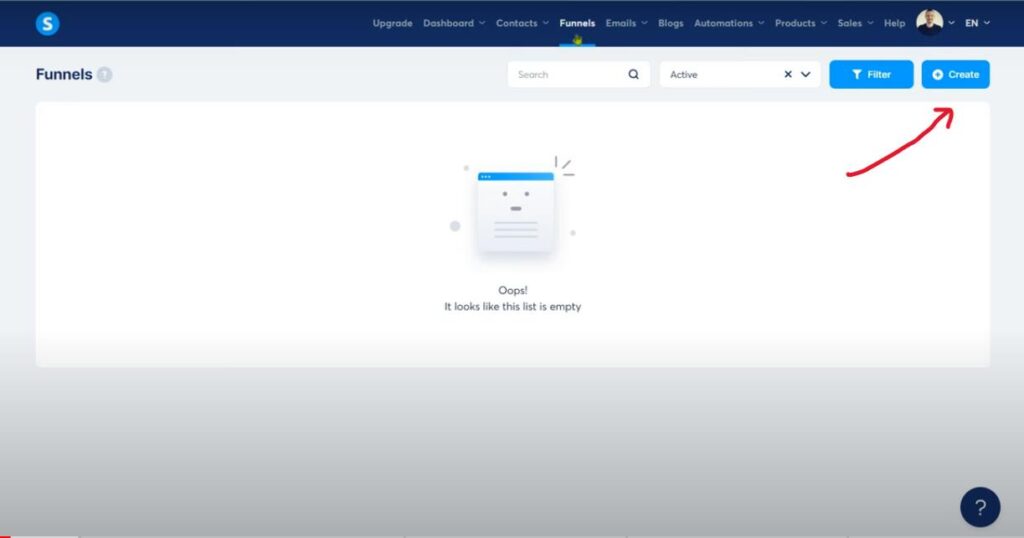
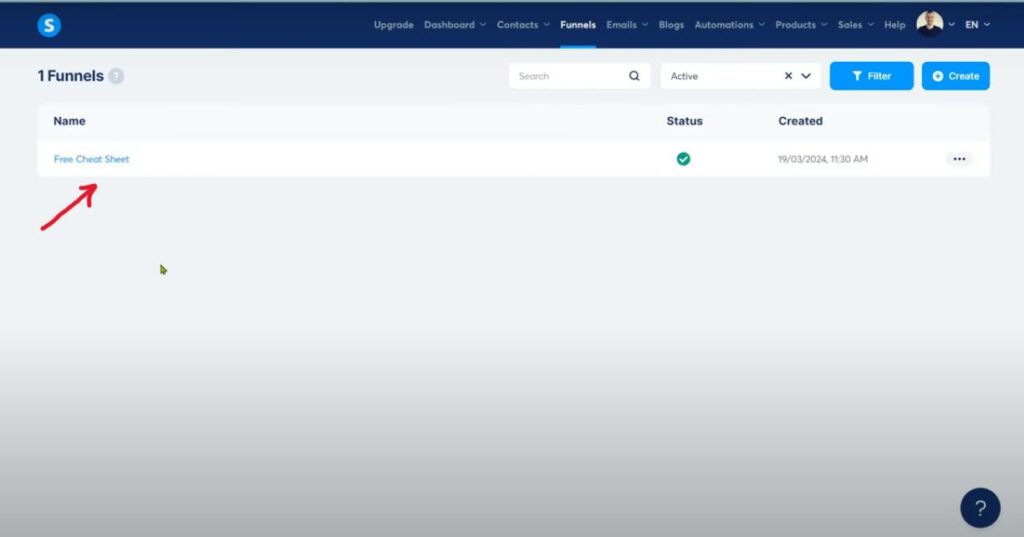
2. On your dashboard simply click on ‘Funnels’ then create .
You will find some systeme.io funnel templates
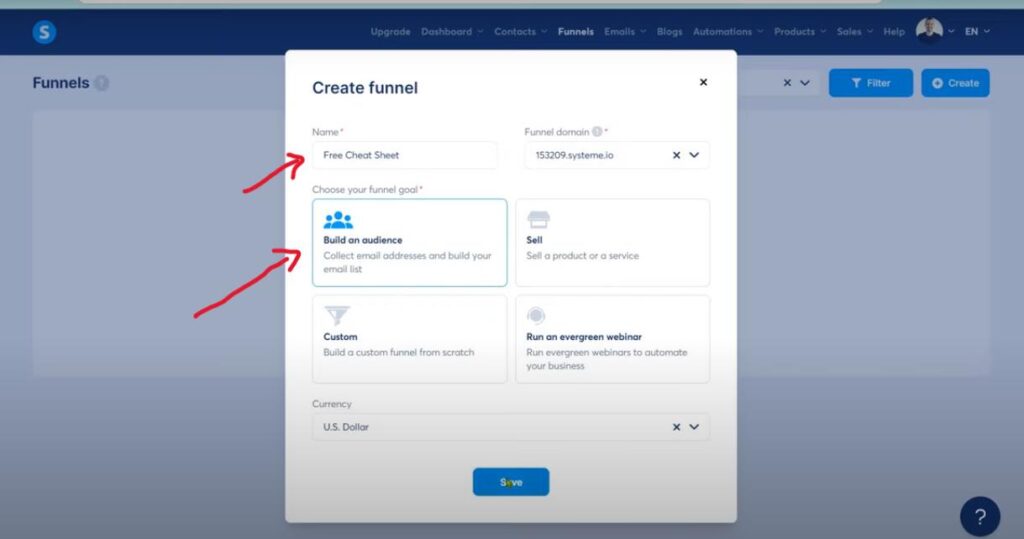
3. Give your funnel a name and choose your goal then save
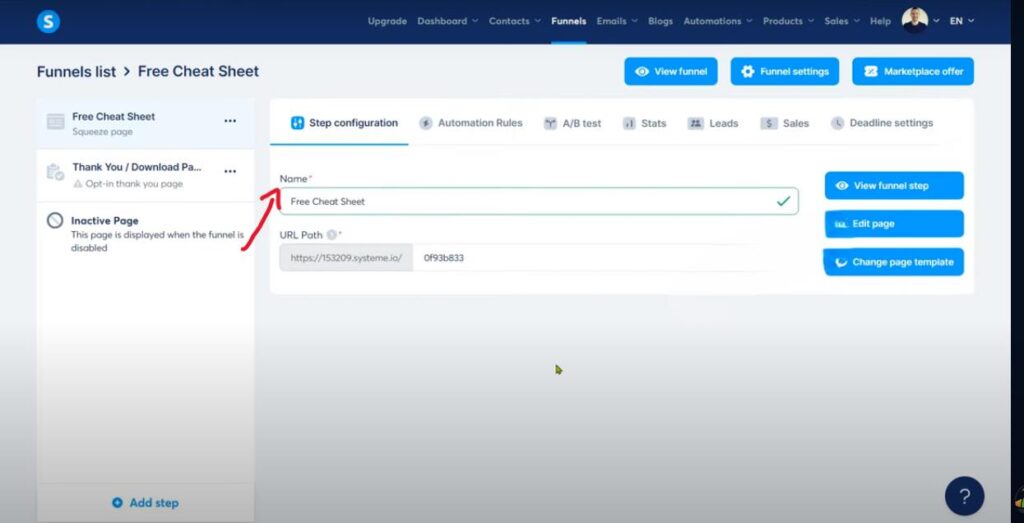
4. Click on the name of your funnel
5. Now you have some landing pages templates to choose from.
Choose the one resonates with your brand and product. Preview the template before starting
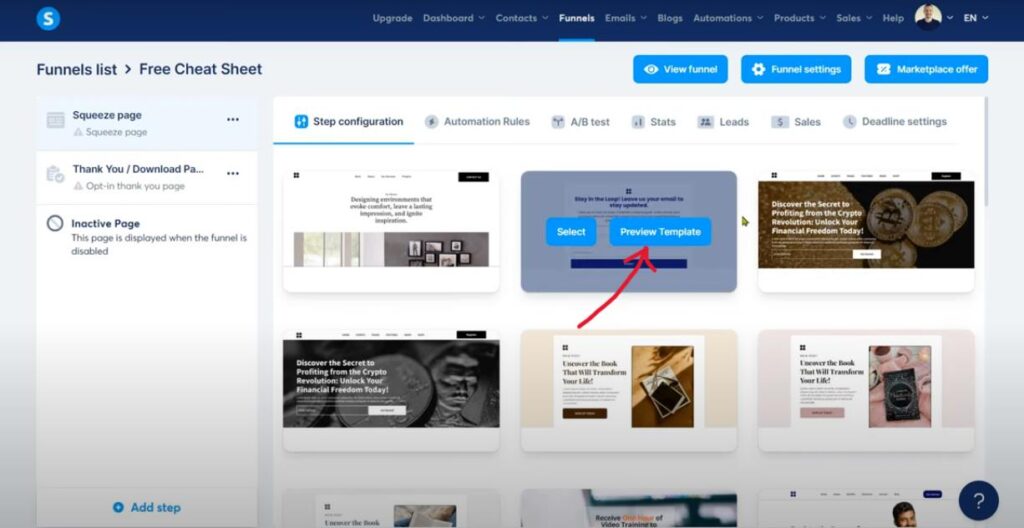
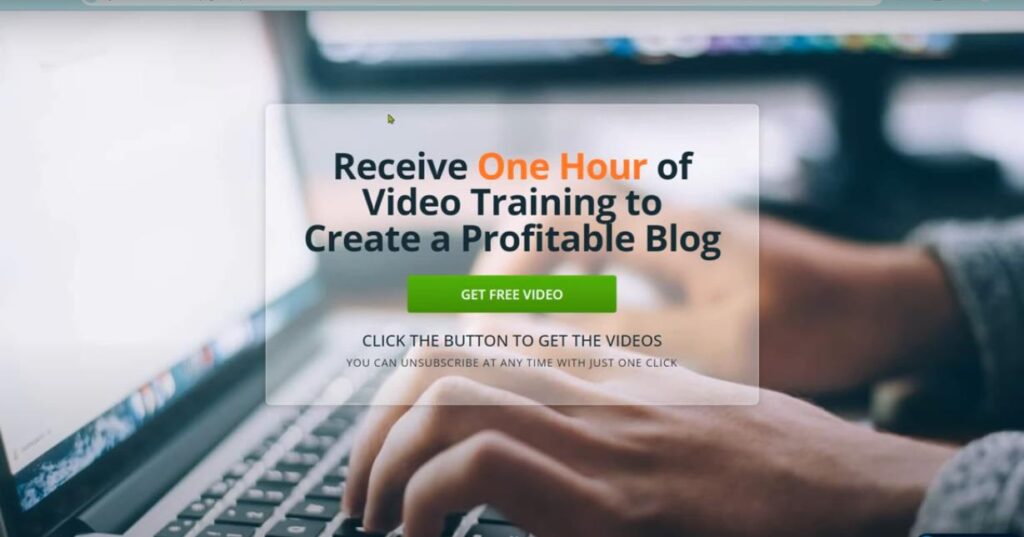
Here is the landing page I chose to preview
6. Then select it if you like it
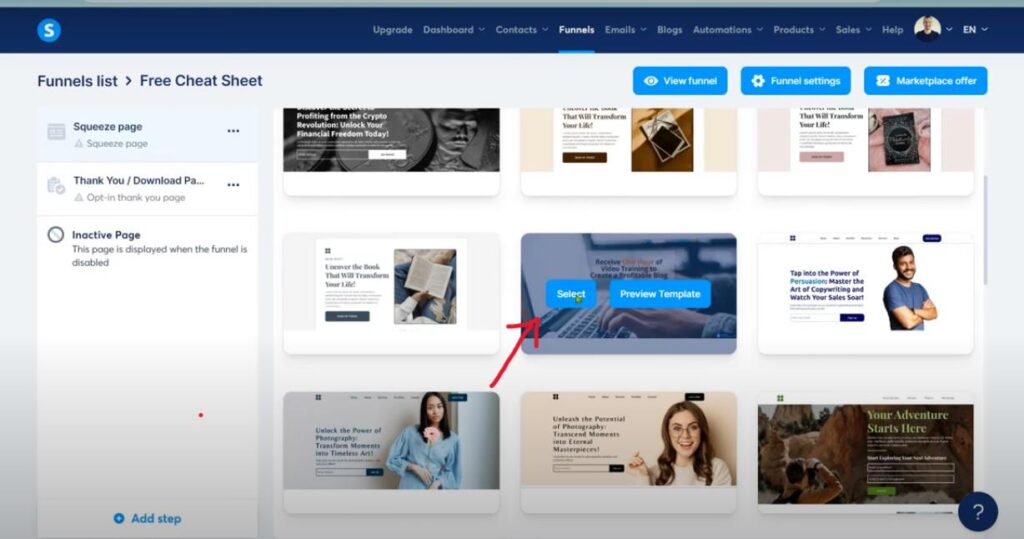
7. Give it a name
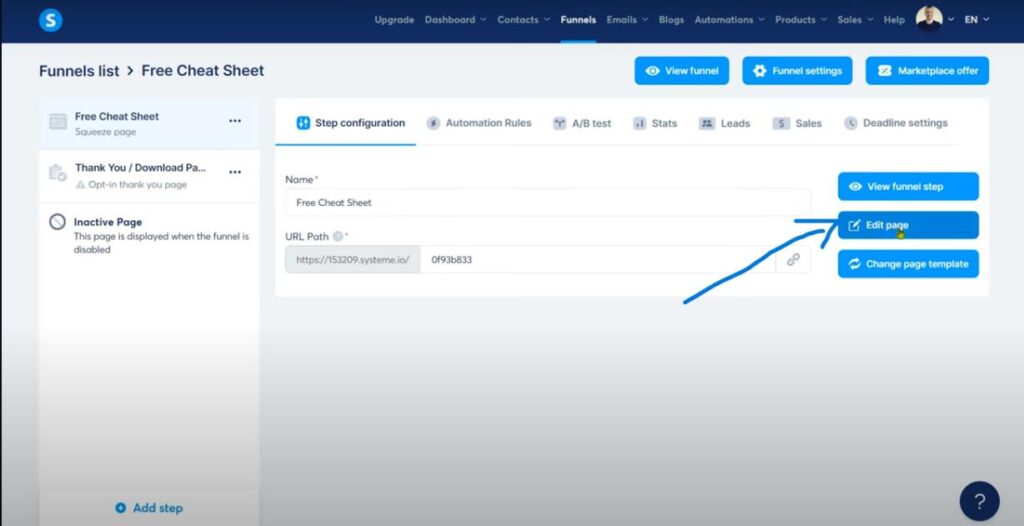
8. Click ‘edit’ to start the editing process
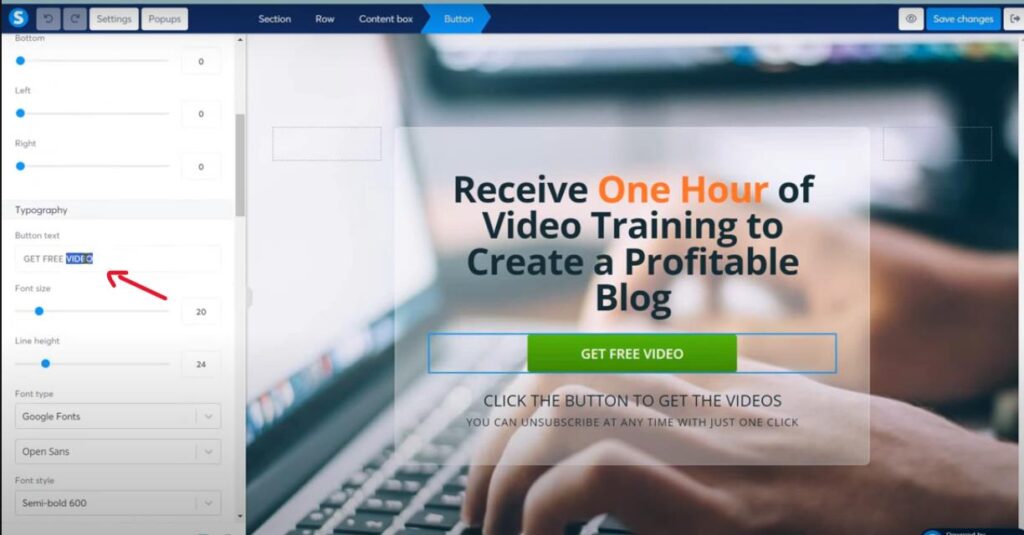
9. Now you have the raw landing page.
You can edit the main text or click on the green button to change the text.
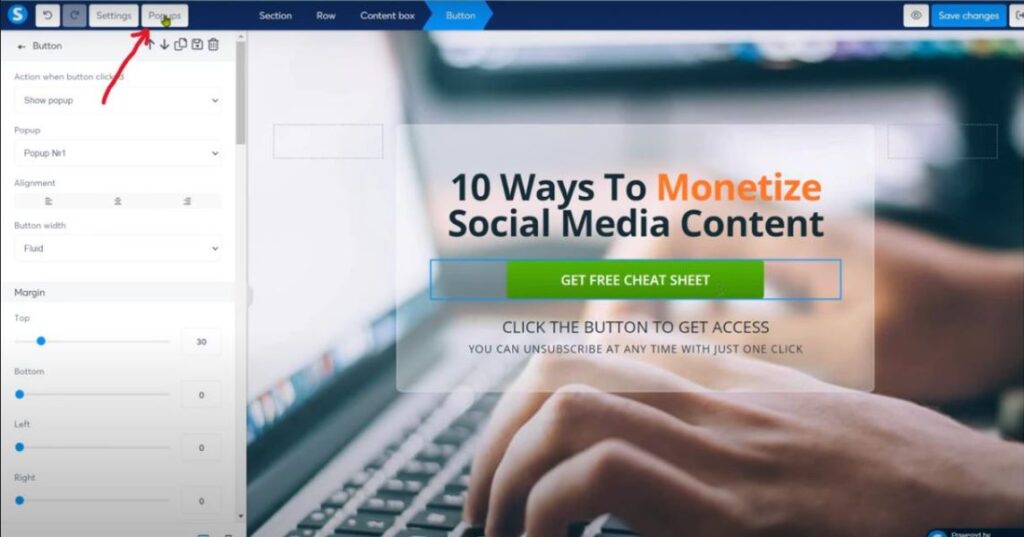
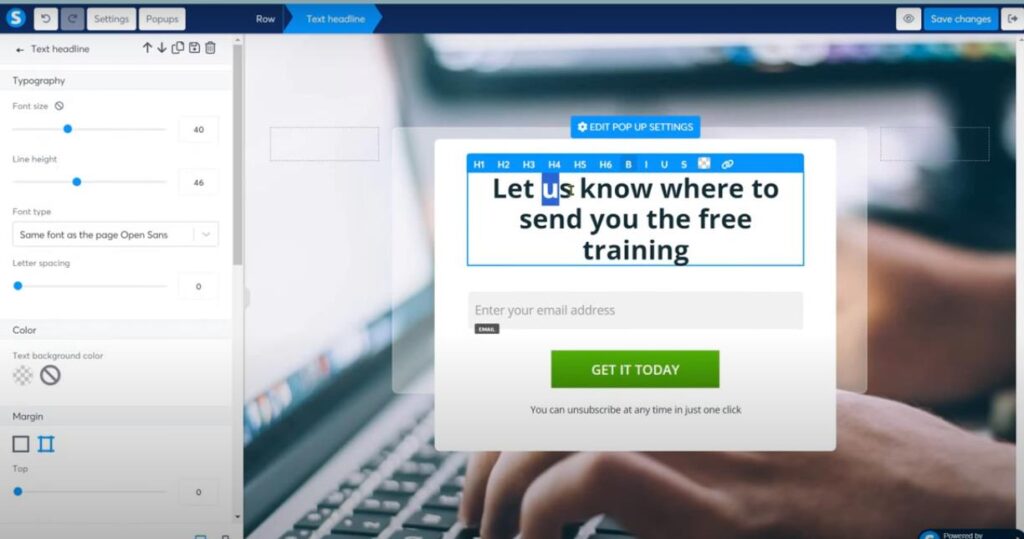
10. Create the popup ( where the user will enter their email)
Click on popus
11. Now you can change the text by directly clicking into the box
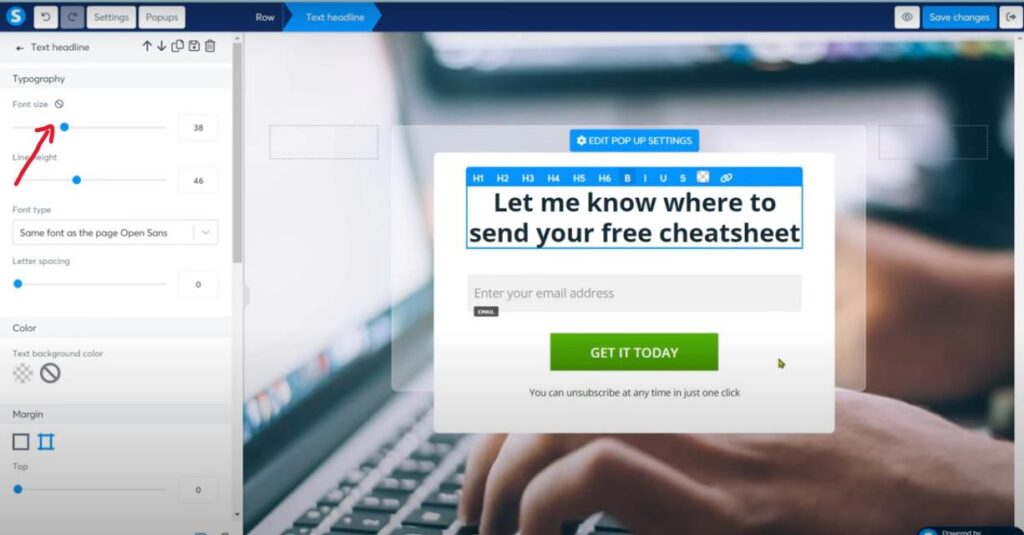
12.You can change the size font to fit your need and appear most appealing for users
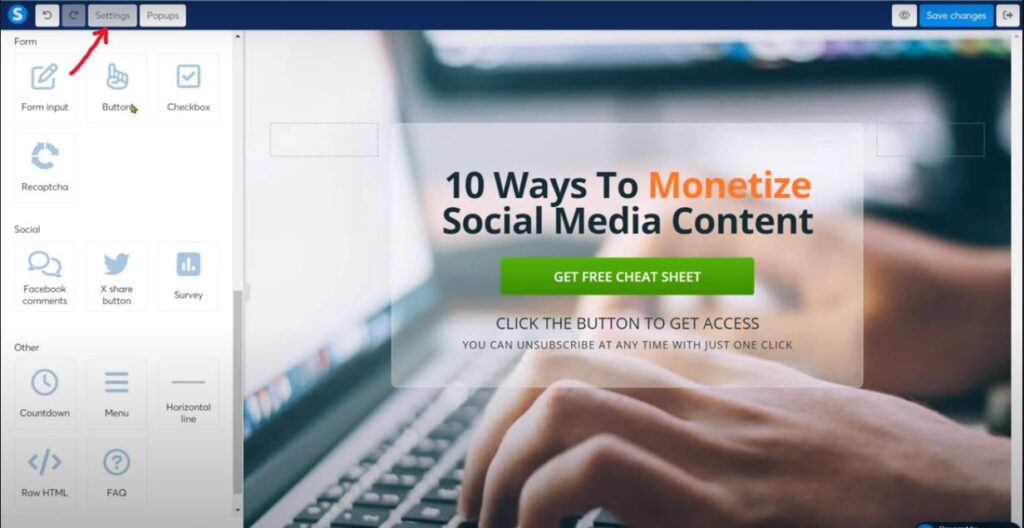
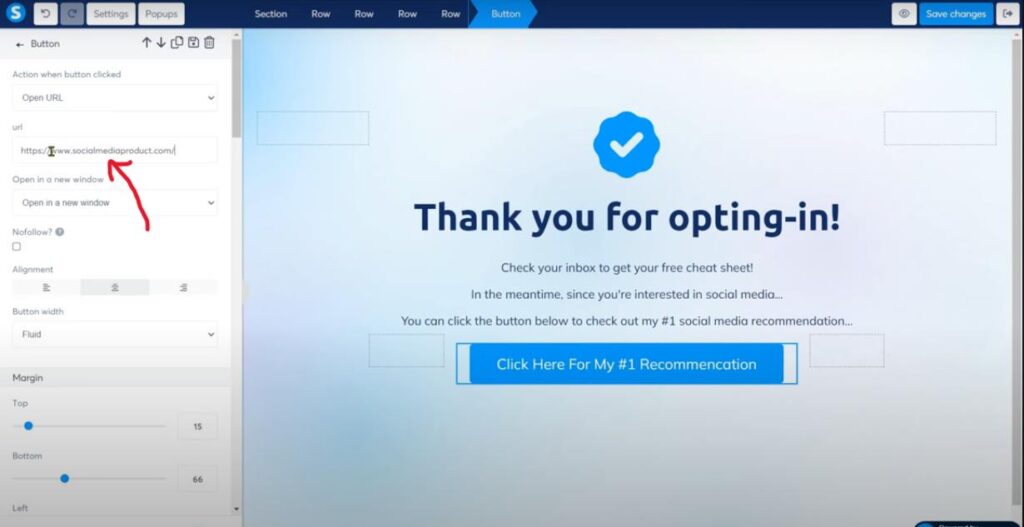
13. If you need to change the image of the landing page click on ‘settings’
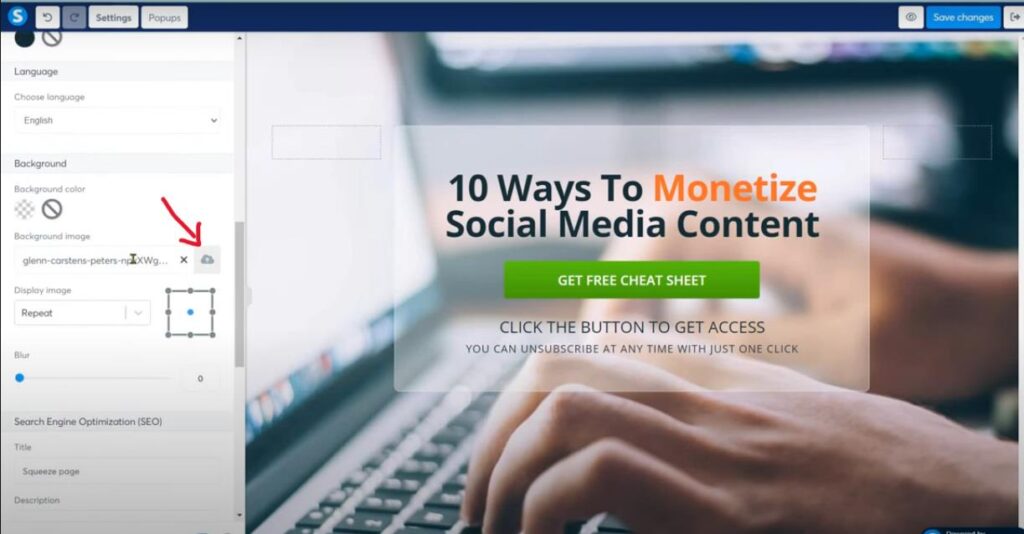
14. Click on the upload icon
15. Now go back to you dashboard to create the ‘Thank you’ page
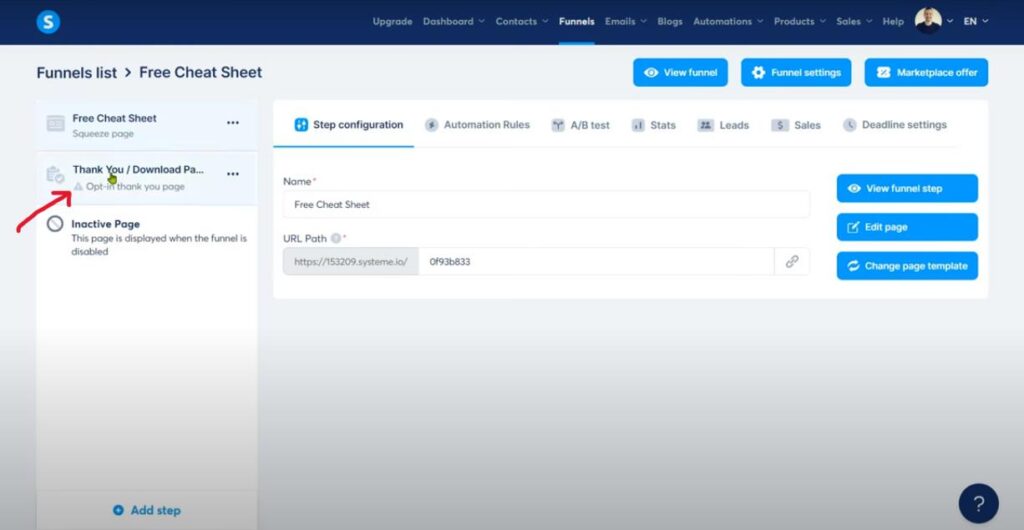
16. Choose from the various templates available on Systeme.io
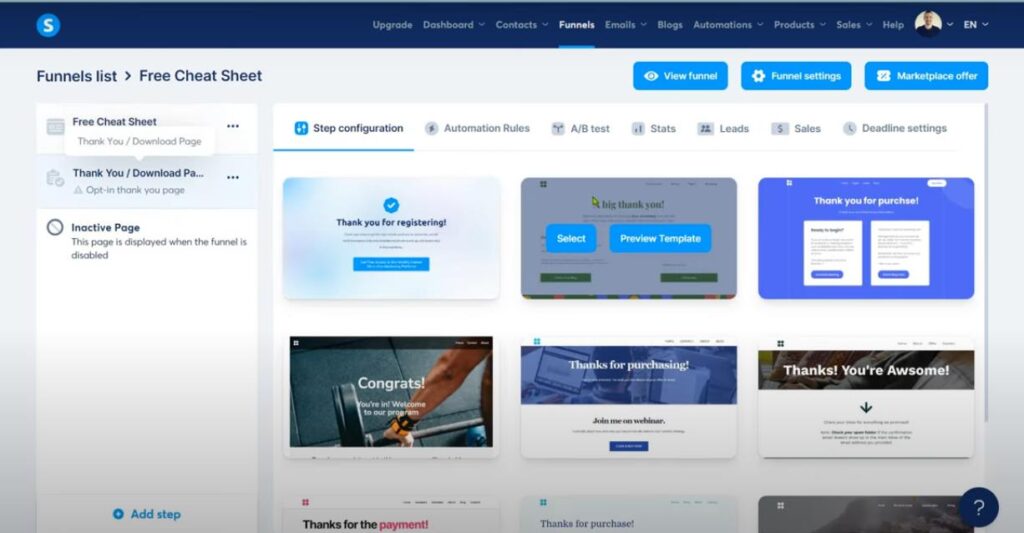
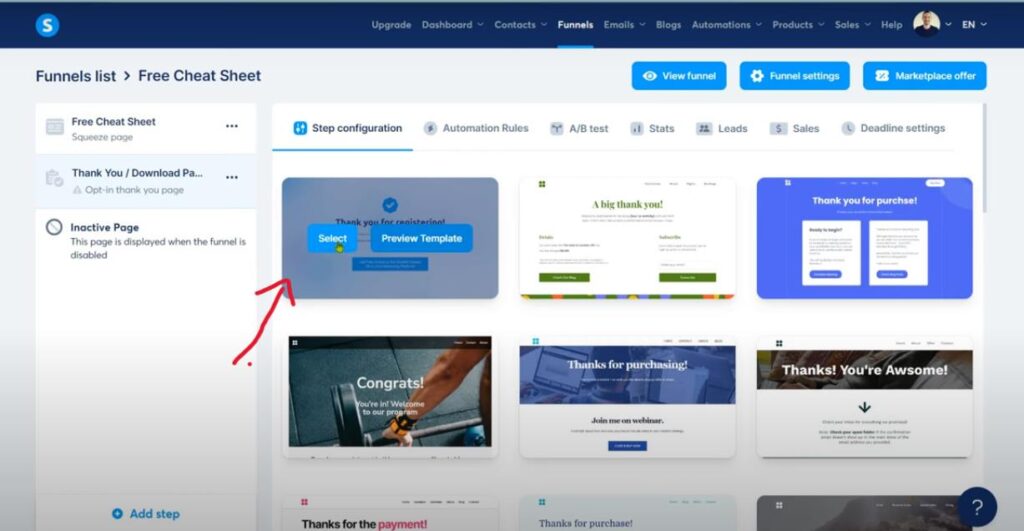
17. Just like before , preview the template you like most then select it
18. Give it a name and start editing
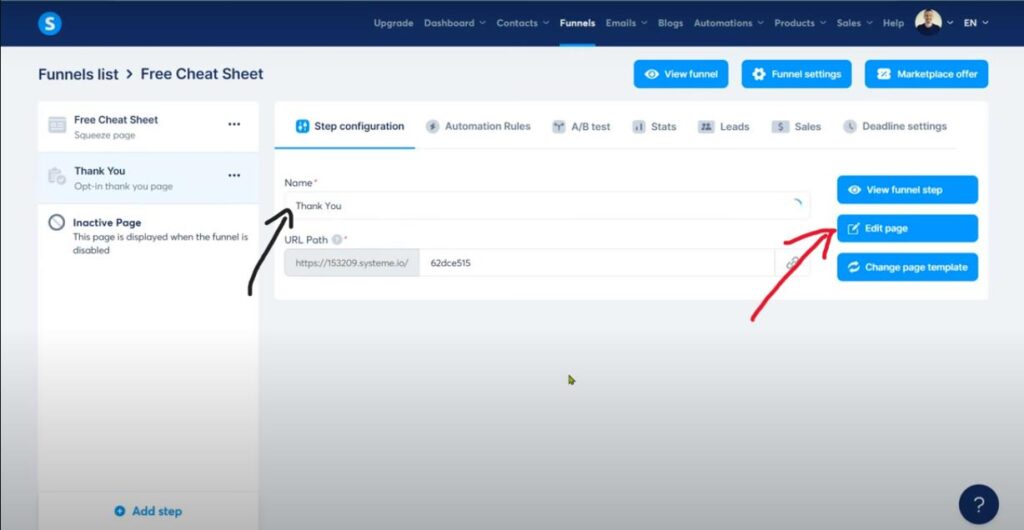
19. Change the text as you like and click on the blue button to insert your link then save.
You are all done here. But still something to consider if you have some time. It will make a difference for you.
B. Create the email sequence :
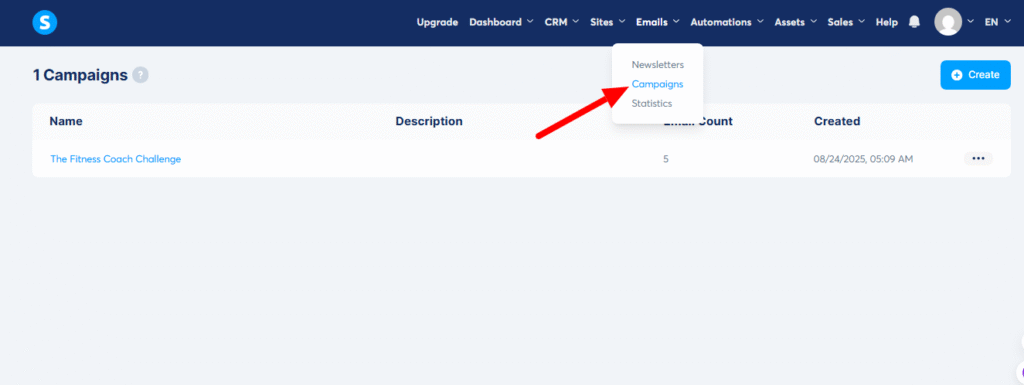
- From your dashboard, click on campaigns
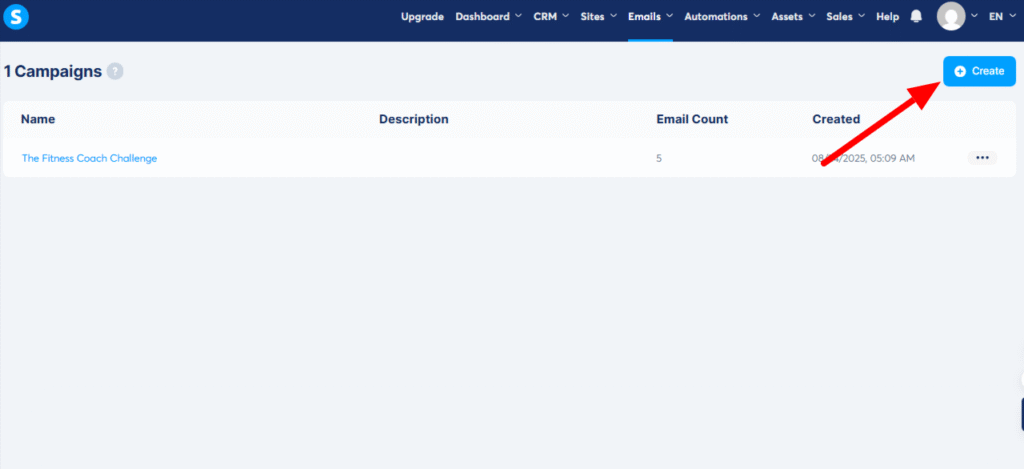
2. Click on ‘ create’ :
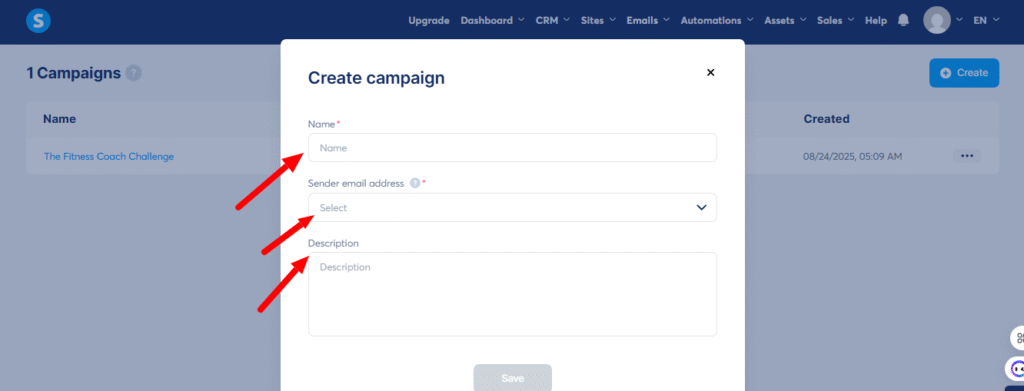
Give it a name, choose sender email address and write a description
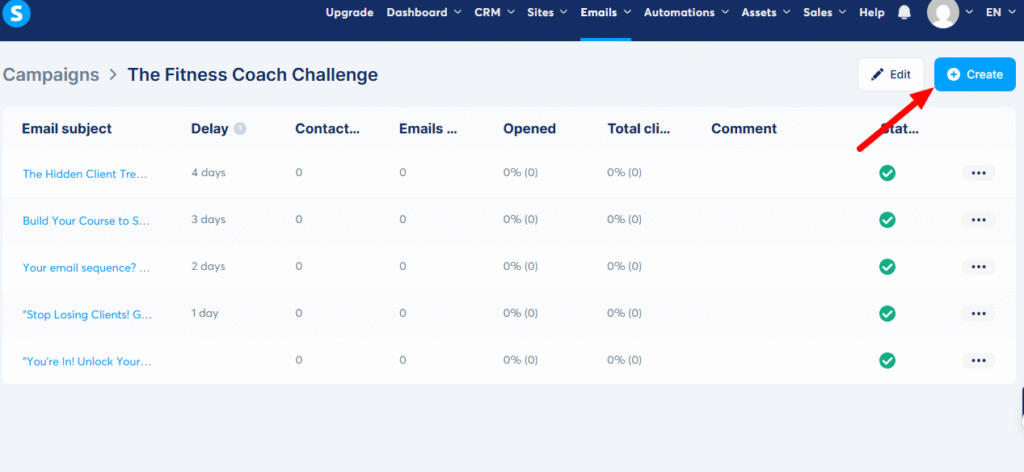
3. Click on the name to start creating e-mails:

4. Click on ‘Create’ to add an email to your campaign
5. Fill in the email details and save
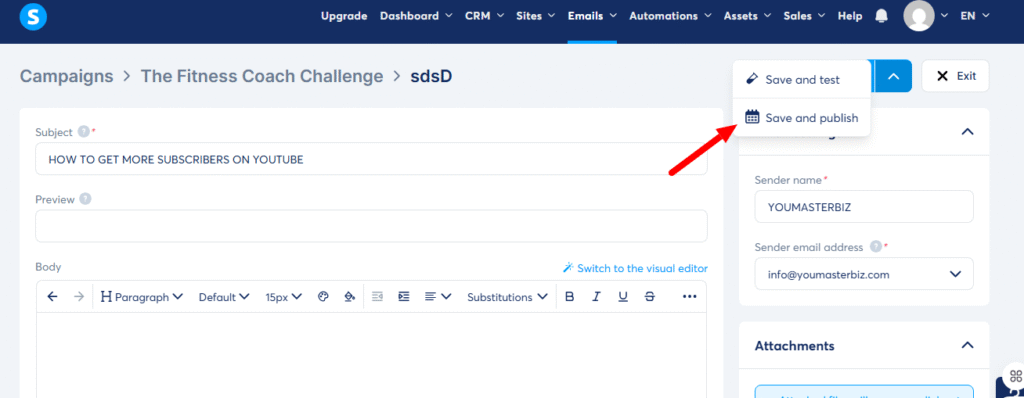
6. Click on this icon to set how much time you want to delay before sending your e-mail
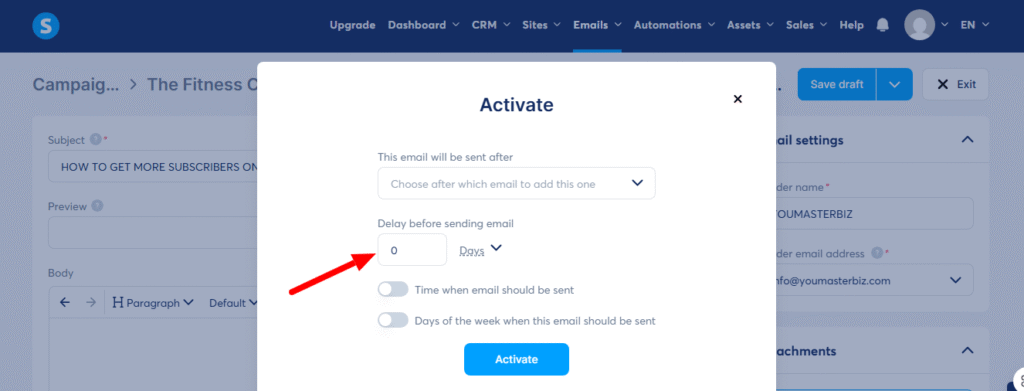
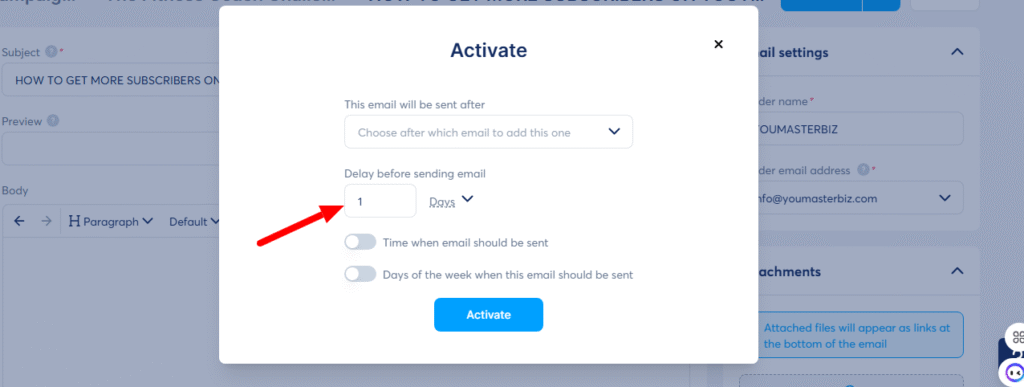
7. Set the time you prefer
Extra note: For welcome emails it would be zero.
For other follow-up emails , you would start from day 1
C. Create the email automation
Email automation is when you set up emails to send automatically based on what
your leads or customers do—like signing up for a newsletter or downloading a guide.
It matters because it saves you time, keeps your audience engaged, and makes sure
the right message hits their inbox at the right moment.
Step-by-step tutorial how to create an automation
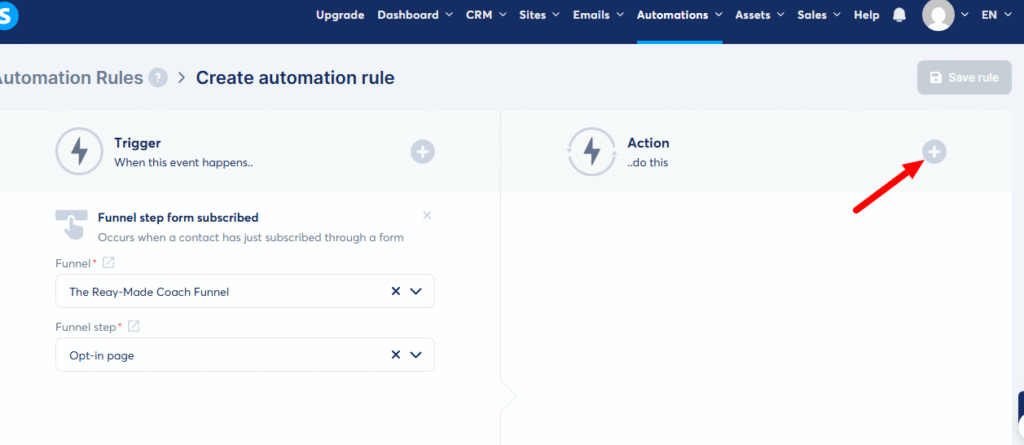
- From your dashboard ( under Automations) , Click on ‘rules’
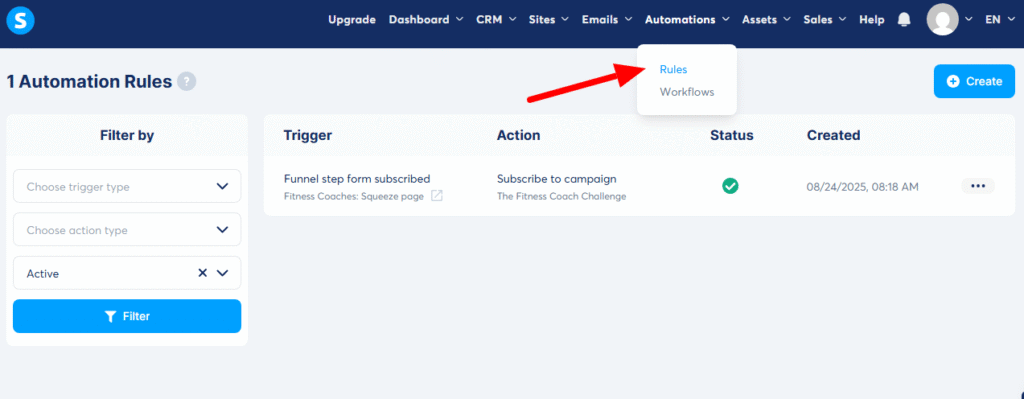
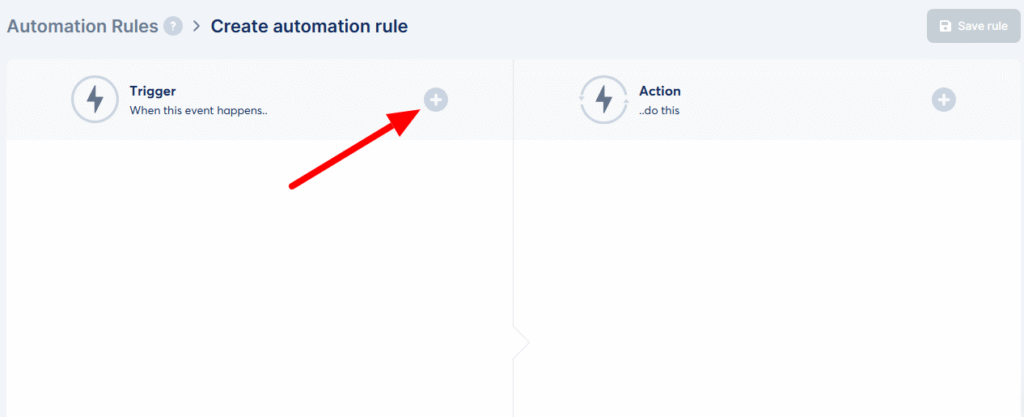
2. Click on the + sign to start your automation
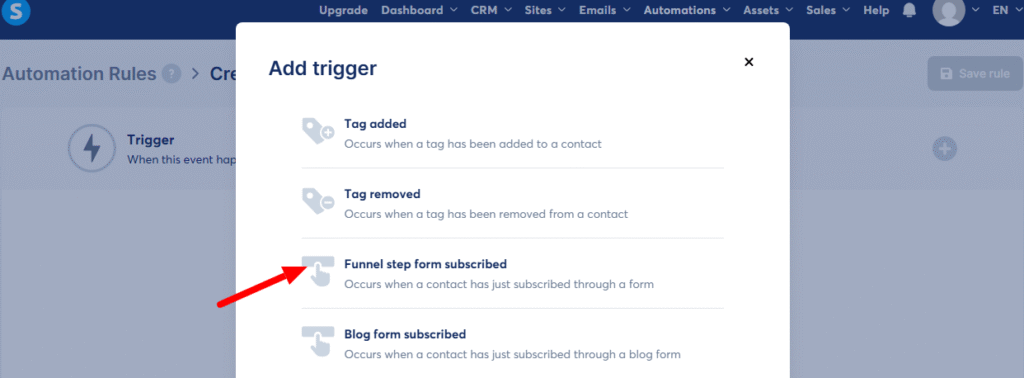
3. Choose ” funnel step from subscribed”
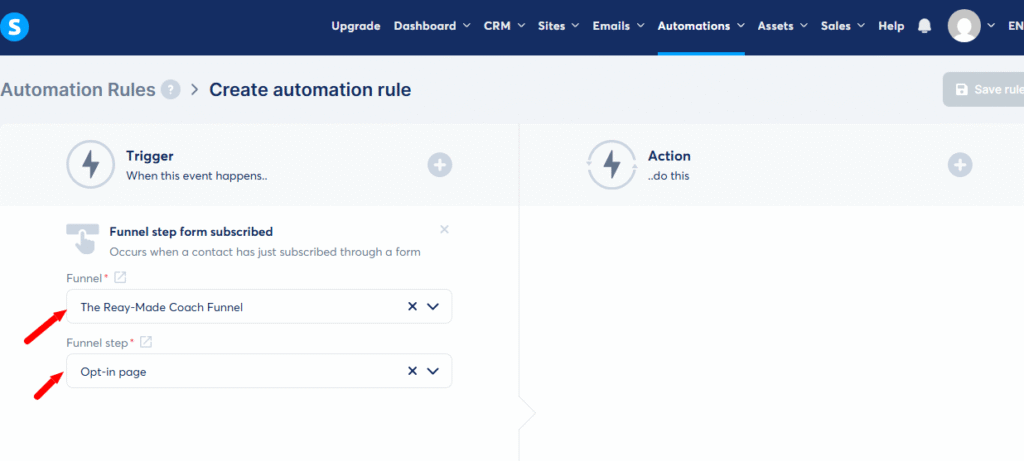
4. Select your funnel name and funnel step (the page a lead signs up through) which
is usually an ( opt-in page) :
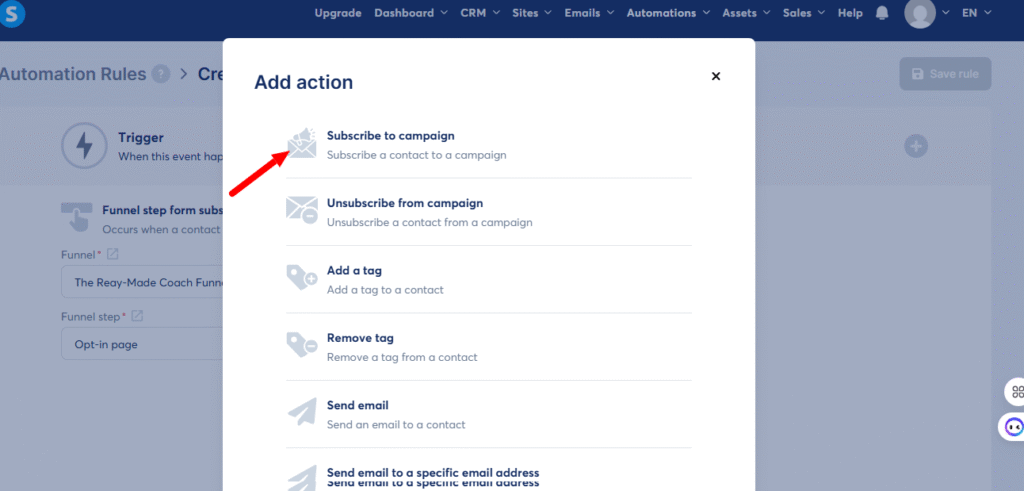
5. Click on the + button to set the action you want to create
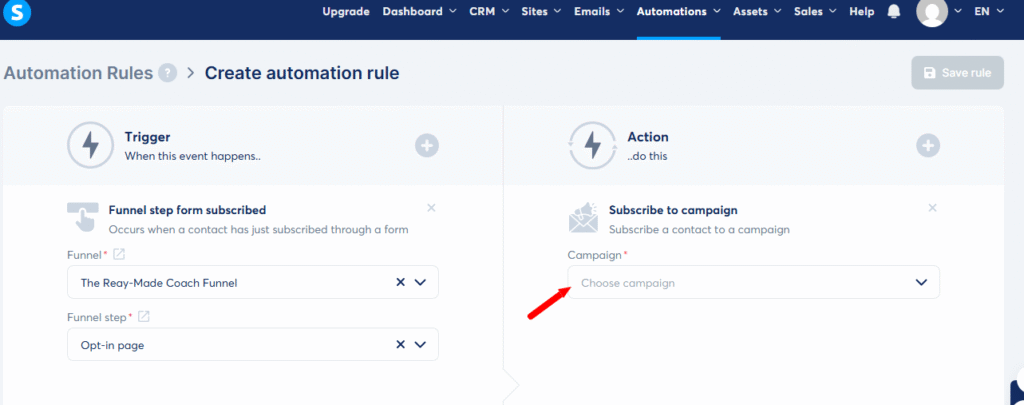
6. We want our to subscribe to the campaign we have created
7. Select the campaign name
This is really fascinating, You’re an overly skilled blogger.
I have joined your feed and look ahead to in quest of more
of your fantastic post. Also, I’ve shared your site in my social
networks
Thank you. I am pleased I could help
Good shout.
Thank you . You’re more than welcome here.